
Creating a gallery wall is a wonderful way to bring personality and visual interest to your space, showcasing your favorite photos, artwork, or prints. While it’s often a maximalist’s dream, this technique can also suit minimalist styles beautifully. Last year, I shared 10 Tips for Creating a Gallery Wall, but in this post, we’re diving into the specifics of achieving perfectly even spacing. A symmetrical gallery wall offers a timeless, balanced look that complements any decor style.
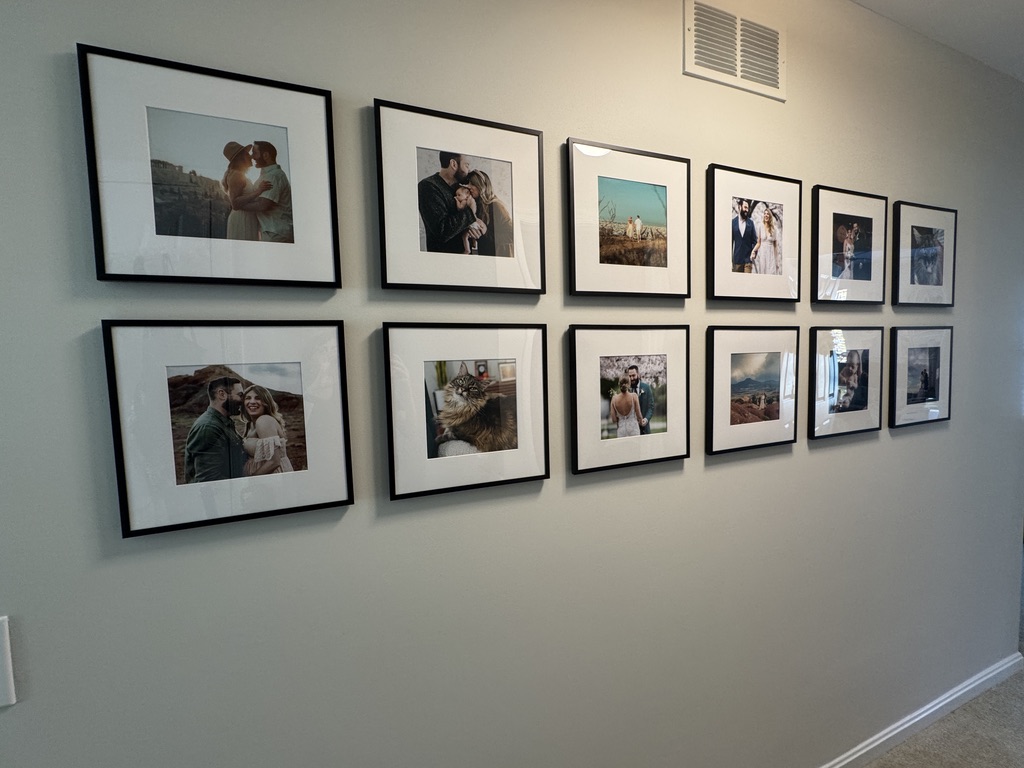
I wanted to frame photos that hold special meaning to us – basically all of our recent milestones, from our engagement photos, wedding, honeymoon, maternity, newborn, and of course a couple of the cat.

This post may contain affiliate links. This means if you purchase through these links, I may earn a small commission, at no extra cost to you. I only recommend products that I personally use and trust, which is why not all the links are affiliated. Your support helps me keep this blog running and allows me to continue creating helpful content. Thank you for your support!
TikTok Video
Here’s a quick before & after video I posted to TikTok!
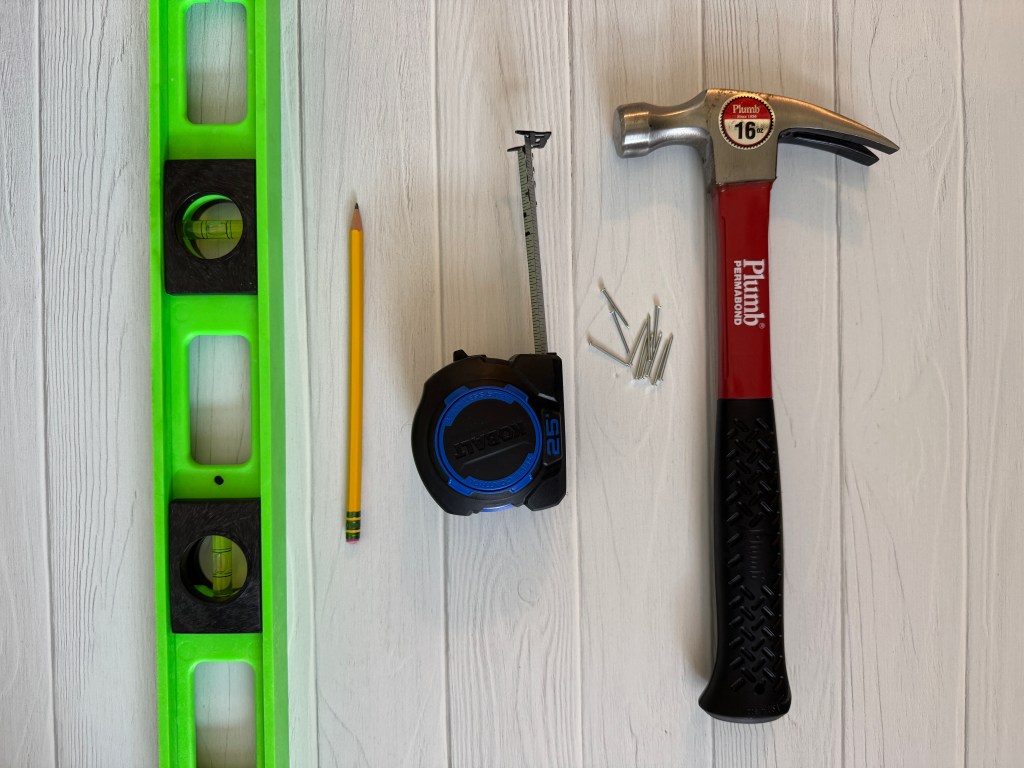
Materials & Supplies Needed
1. Photos or Art
Pick out an even number of prints you want to frame.
You want to make sure your selected prints:
- Are printed at the same size (e.g.; 8″ x 8″, 12″ x 12″, 5″ x 7″, 8″ x 10″, etc.).
- Consider the wall space and whether you want the photos matted in the frame when determining an appropriate size. I used 8″ x 8 ” square prints knowing I would be using 12″ x 12″ matted frames.
- All have the same aesthetic (don’t mix and match photos and art – the style and theme should be the same to achieve a cohesive, classic look).
Photo Tip: Please don’t use your local pharmacy’s 1-hour photo to print digital photographs for your wall. The quality of these prints is very low. I exclusively use Mpix for my prints and I’ve always been happy with the results (and I print A LOT – photo books, magnets, photo prints, etc.). If you use my referral code here, you’ll save $10 off your first order!
2. Frames
Purchase a matching set of frames for your prints. Every frame should be the exact same. The quantity and size of frames you choose should be based on the available space and picked in congruence with your print selection. If you choose a lot of prints to display, your frames (and prints) will be smaller than if you only have a few. You want the gallery to fill the space just right.
I used square 12″ x 12″ frames from Ikea but there are many sets available on Amazon, too.
3. 24″ Level
You don’t need anything fancy but you want to make sure you have a level longer than 12″ because chances are you’ll need to be leveling space longer than that. You also want to make sure it has a built-in ruler. I picked mine up at Wal-Mart a few years ago but Amazon has some affordable options, like this one.
4. Measuring Tape
What home decor project doesn’t require use of a measuring tape?
5. Pencil
To make marks for nail placement.
5. Hammer & Nails
Make sure you get nails that will securely hold the frames. Different frames have different hanging hardware (sawtooth and D-rings, for example). Consider using screws if your frames are quite heavy.
Measurements to Take
Take the following measurements:
- Frame Width
- Frame Length
- Desired Space Between Frames
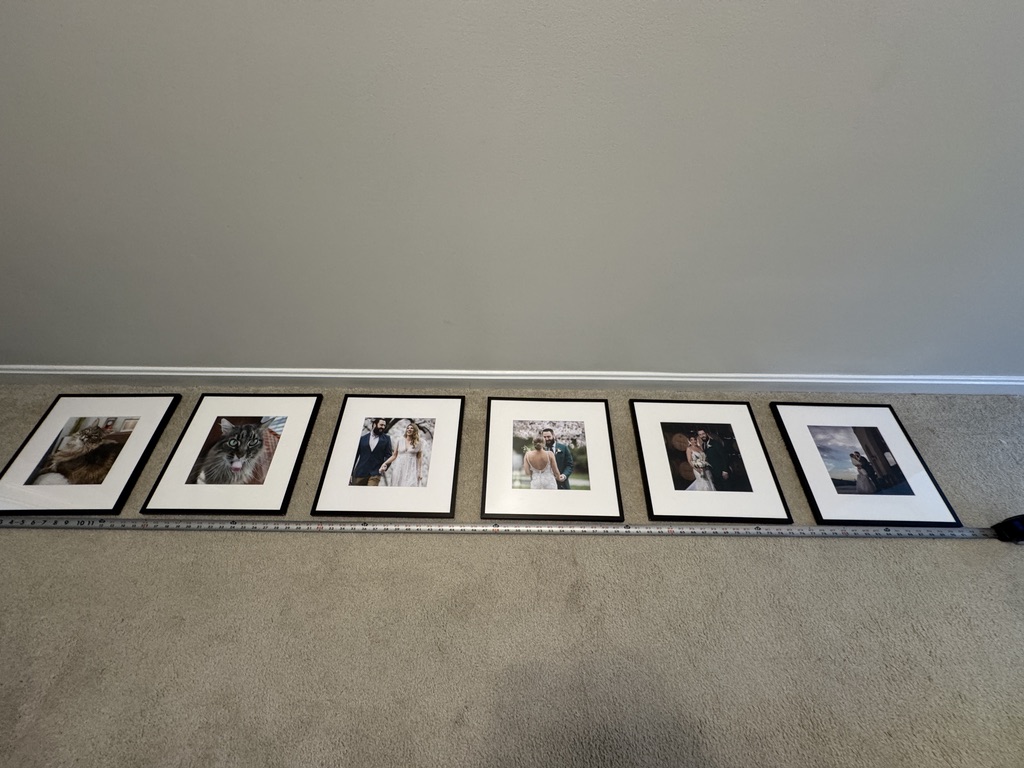
- Lay out your frames on the floor beneath the wall to determine the best distance.
- I recommend no more than 3″ as you want the gallery to be cohesive. I used 2.5″ both vertically and horizontally. Whatever you choose for horizontal spacing should be the same you use for vertical.
- Total of ‘Frame Width’ + ‘Desired Space Between Frames’
- Top of Frame to Hanging Hardware
- Sawtooth: Make sure the measurement is where the nail would go, under the sawtooth.
- D-Ring: Make sure the measurement is to the top of the lifted D-ring, where it would sit on the nail.
- Total of ‘Top of Frame to Hanging Hardware’ + ‘Desired Space Between Frames’

Steps to Create a Symmetrical Gallery
I recommend reading through all the steps before beginning as some steps are best when approached together.
Step 1: Determine Horizontal Spacing
Place your frames on the floor directly below the wall where they’ll be hung. Arrange them to decide how much space you want between each frame and to establish the position of the first frame (the first frame is considered the top left frame). Once you’re happy with the layout, make a small pencil mark on the wall to indicate the left edge of the top frame.
If you can’t put them on the floor beneath the wall because of furniture placement, take a measurement of the wall space and do this same exercise elsewhere, ensuring to stay within the measured width of the wall.
Step 2: Determine Vertical Spacing
To determine the height of your gallery wall, first calculate the length of each column by using this formula: (Frame Length x Number of Frames in a Column) + Space Between Frames. This gives you the total vertical space each column will occupy.
Hold this measurement up to the wall to decide the height for the top edge of the first frame. A good guideline is to have the center of the gallery wall around eye level, typically 57 to 60 inches from the floor, though you can adjust based on ceiling height, furniture placement (if it’s being hung above furniture), and personal preference. It’s okay to eyeball what looks appropriate.
Make a light pencil mark on the wall to indicate the top edge of the first frame. Ideally, you’ll hold the frame at the left edge mark and draw a line the full width of the top edge.
Step 3: Place the First Nail in the Top Row
Start at the mark you made for the top edge of the frame. From the center* of this mark, measure down by the distance between the top of the frame and the hanging hardware (your ‘Top of Frame to Hanging Hardware’ measurement). Mark this spot with a small dot—this is where you’ll place your first nail. (*This assumes your hanging hardware is in the center of the frame. If it is not, then you want to measure down from where the hanging hardware is situated on the frame.)
Hammer it in.
Note: If you did not mark the full width of the frame, you’ll need to take another measurement: ‘Side of Frame to Hanging Hardware.’ In addition to measuring down from the top edge, you’ll measure in from the side edge, and where the two lines meet is where your nail hole will go.
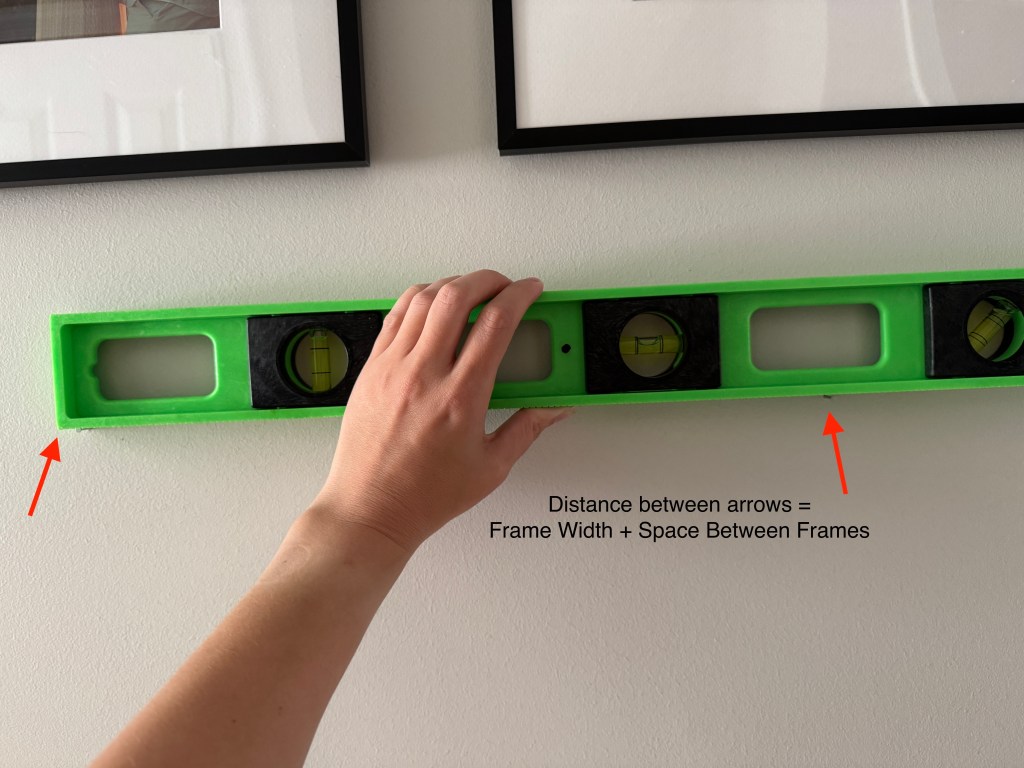
Step 4: Place Subsequent Nails in the Top Row
Now, use your level to position the next nails. Measure the distance of ‘Frame Width’ + ‘Desired Space Between Frames‘ from the center of the first nail to where the next nail will go. Make sure your level is straight as you go, and mark this spot, then hammer in the nail.
Repeat this process across the row until you have the necessary nails in place.
Tip: To check your spacing, you can hang each frame as you go. Measure the space between frames to make sure it’s accurate. Note, if your frames use sawtooth hangers, it may appear that the measurement is off but you just need to make a slight adjustment to how the frame is hung on the sawtooth. I checked the first few and when they were all good, I just hammered in the rest of the nails without checking and that worked out well.


Step 5: Place the First Nail for the Second Row
With the first row of frames hung, you can start on the second row. To find where to place the first nail for this row, use this measurement:
Total of ‘Top of Frame to Hanging Hardware’ + ‘Desired Space Between Frames’
From the center* of the bottom edge of the top left frame, measure down by this total. This point is where your nail will go for the first frame in the second row. (*Again, this assumes your hanging hardware is in the center of the frame. If it is not, then you want to measure down from where the hanging hardware is situated on the frame.)
Step 6: Place Subsequent Nails for the Second Row
Repeat step 4 to place subsequent nails for the second row.
Step 7: Repeat Steps 5 and 4 for Remaining Rows
If you have more than 2 rows in your gallery, repeat Step 5 to place the first nail in the next row, and repeat Step 4 to place the remaining nails in that row.
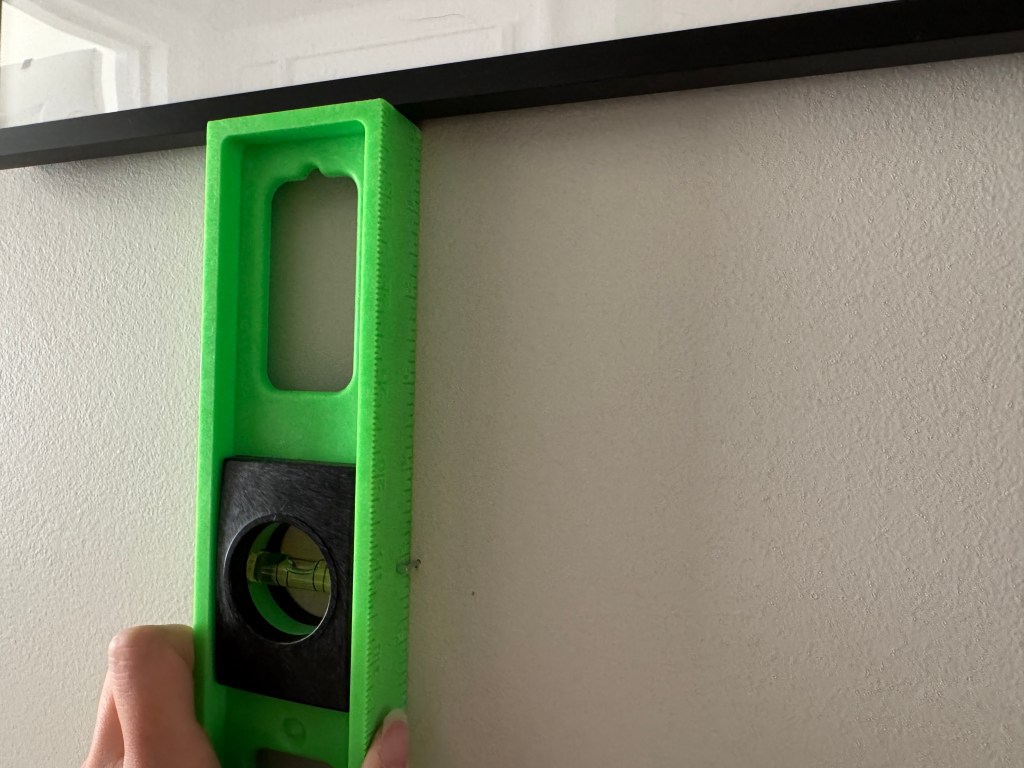
Step 8: Hang Up All Frames to Check Alignment
Hang each frame on its nail to make sure they’re all evenly spaced as planned. For frames with sawtooth hangers, you might need to adjust slightly by shifting the frame left or right on the nail to get the spacing just right.
Every time I walk up the stairs and see this gallery wall full of memories of our recent milestones, it warms my heart and makes me smile. I hope you’ll find the same joy from the frames you hang in your own home!
Let me know how it goes in the comments or if you have any questions!
Discover more from Around with Ash
Subscribe to get the latest posts sent to your email.
