
This post may contain affiliate links. This means if you purchase through these links, I may earn a small commission, at no extra cost to you. I only recommend products that I personally use and trust, which is why not all the links are affiliated. Your support helps me keep this blog running and allows me to continue creating helpful content. Thank you for your support!
Want a pop of color in a bedroom? Consider painting your nightstands! This post details out the steps and considerations to successfully achieve a vibrant transformation. By adding a fresh coat of paint to your nightstands, or painting over new ones, you can infuse your bedroom with personality and style. This DIY project is a fantastic way to breathe new life into your bedroom decor (seriously, paint does SO much). So, let’s dive in and discover how you can revamp your nightstands and enhance the overall ambiance of your sleeping space.
Table of Contents
The Background
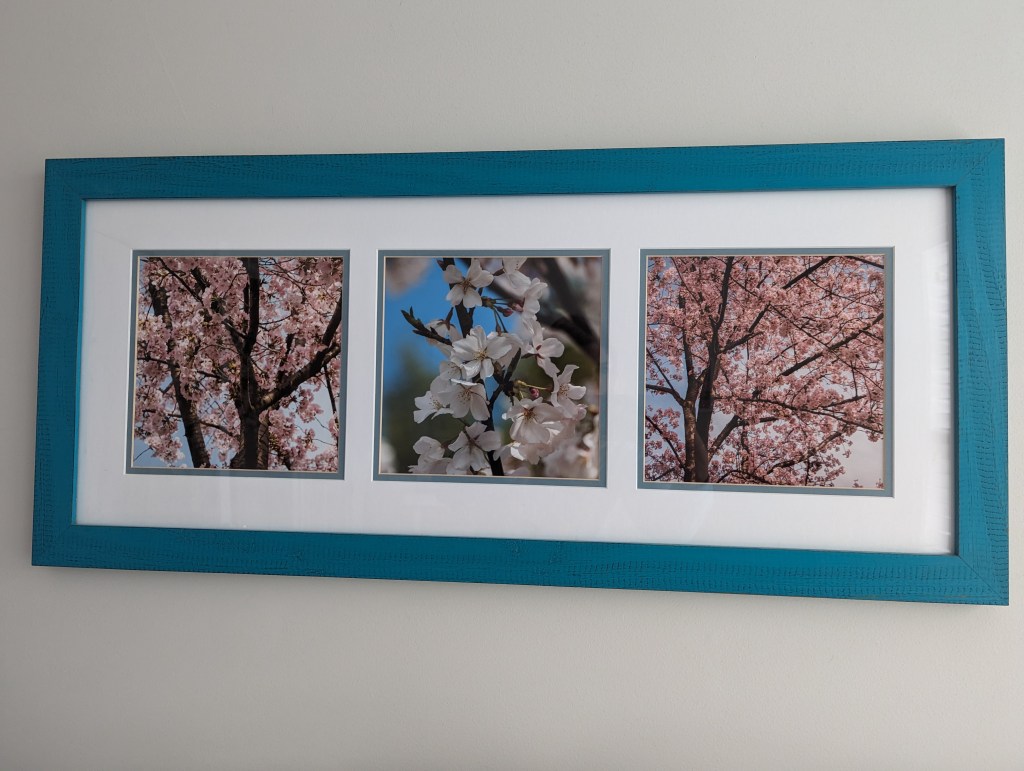
It just takes one item to set the tone for the decor of a room. For our guest bedroom, that was a 3-photo picture frame.
One year in March, I was browsing Instagram and noticed Art to Frames was having a contest. It was simple: “Post a photo of cherry blossoms to enter for your chance to win a $100 gift card!” Living in the DC area, I had a plethora of cherry blossom snaps. I posted/submitted my entry, and lo and behold, I actually won!
In the spirit of the contest, I decided to frame a handful of my favorite cherry blossom shots (I’m a sucker for them, afterall). Now, picking the frame was difficult. At the time, my now-husband and I were living in an apartment that we’d clearly outgrown, and there was absolutely no sense of style. Since the frame didn’t need to match any existing decor, I went bold. I ended up choosing a 3-photo wood frame in a vibrant teal. When it arrived, I was overjoyed! I mean, I won the thing, right? But there was one little hiccup – our apartment had no available wall space, so the frame sat graciously on our living room floor, making itself at home for a couple years until we bought a place.
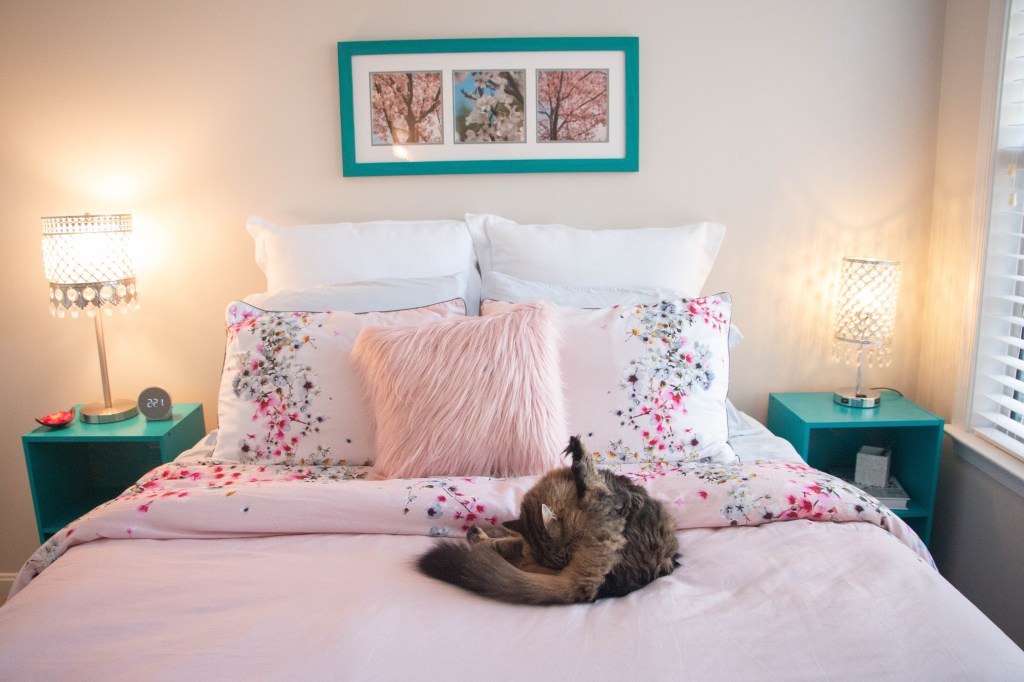
Suddenly we had double the wall space. It was high time for this teal frame to shine. We settled on hanging it above the guest room bed. And just like that, the cherry blossom theme for our guest room came to life!
Now, cherry blossoms encourage the use of a lot of pink, so I still had to figure out a way to work in the teal of the frame. To my husband’s credit, he’s the one who suggested painting nightstands to match. I was all in, and so the research began. I had to hunt down reasonably priced nightstands of the right size and figure out all the supplies needed for the painting project.
The Nightstands
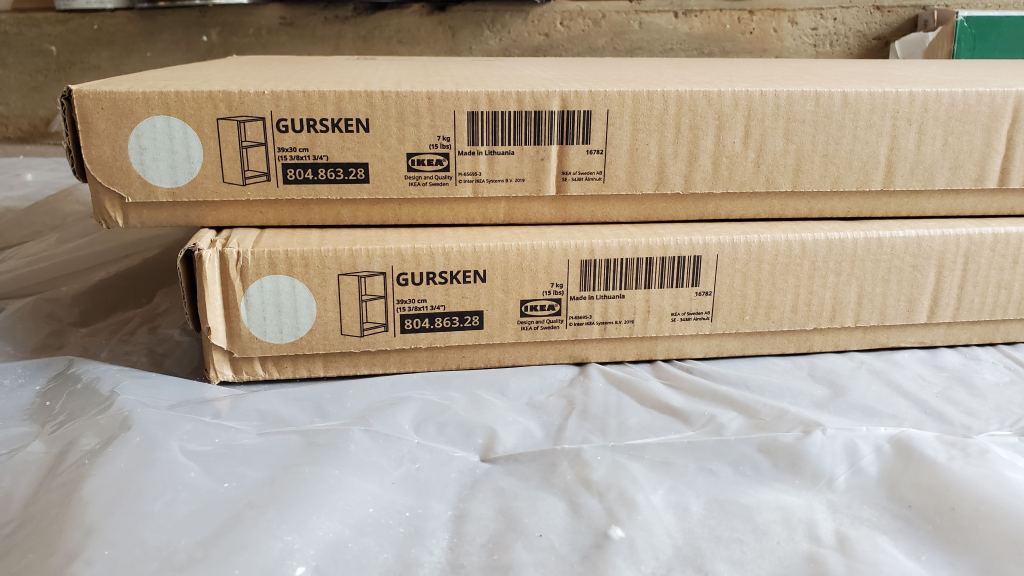
I ended up finding the absolute perfect nightstands at Ikea. I bought two of the Gursken nightstands for $17.99/ea. at the time (inflation is real, guys). This nightstand is simple in style and only comes in one color – light beige. I happen to have a strong distaste for the light beige, but it didn’t matter since I was painting them anyway.
Note – you do not have to buy new nightstands to do this project. You can use your existing ones! If you do paint over your current night stands, I would definitely recommend getting 220 grit sandpaper and sanding the surface prior to cleaning and priming.
The Paint
I went to the local home store and brought back a bunch of teal paint swatches to find the right match. The winner: Behr Paradise Landscape. When painting cabinets, you want to make sure to get the right kind of paint. I bought a quart of the Satin Enamel Interior/Exterior Cabinet, Door, & Trim Paint.
Now it’s also important to prime and top coat.
For the primer, I bought Zinsser B-I-N Ultimate Stain Blocker. This is a shellac-based primer that helps seal your surface against water (including from water-based paint), and ensure the paint goes on smoothly.
For the top coat, I bought Varathane Clear Satin Water-based Interior Polyurethane. Make sure to get the same sheen (satin) as your colored paint. This helps protect the paint from scratches and water damage when it’s finished.
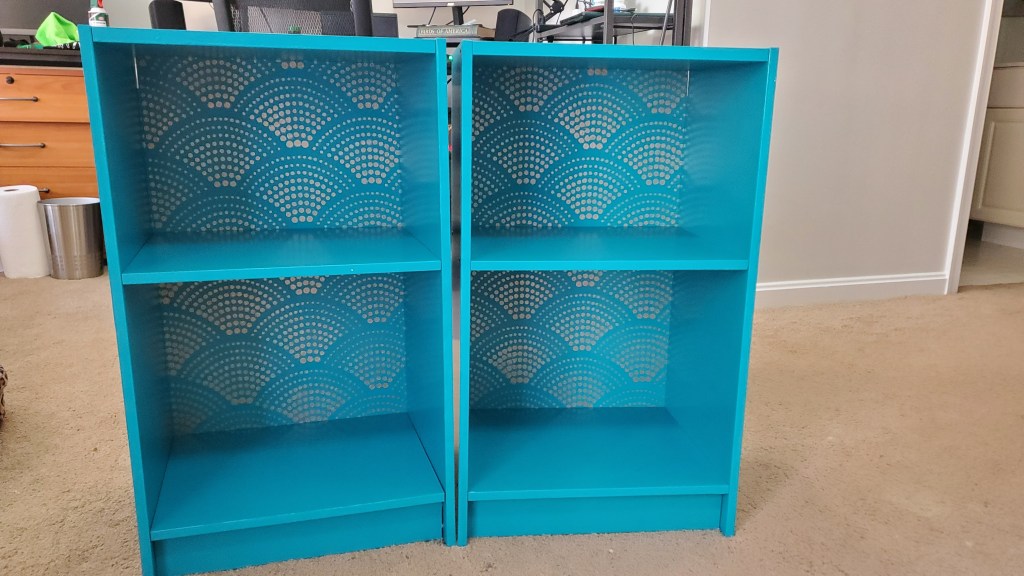
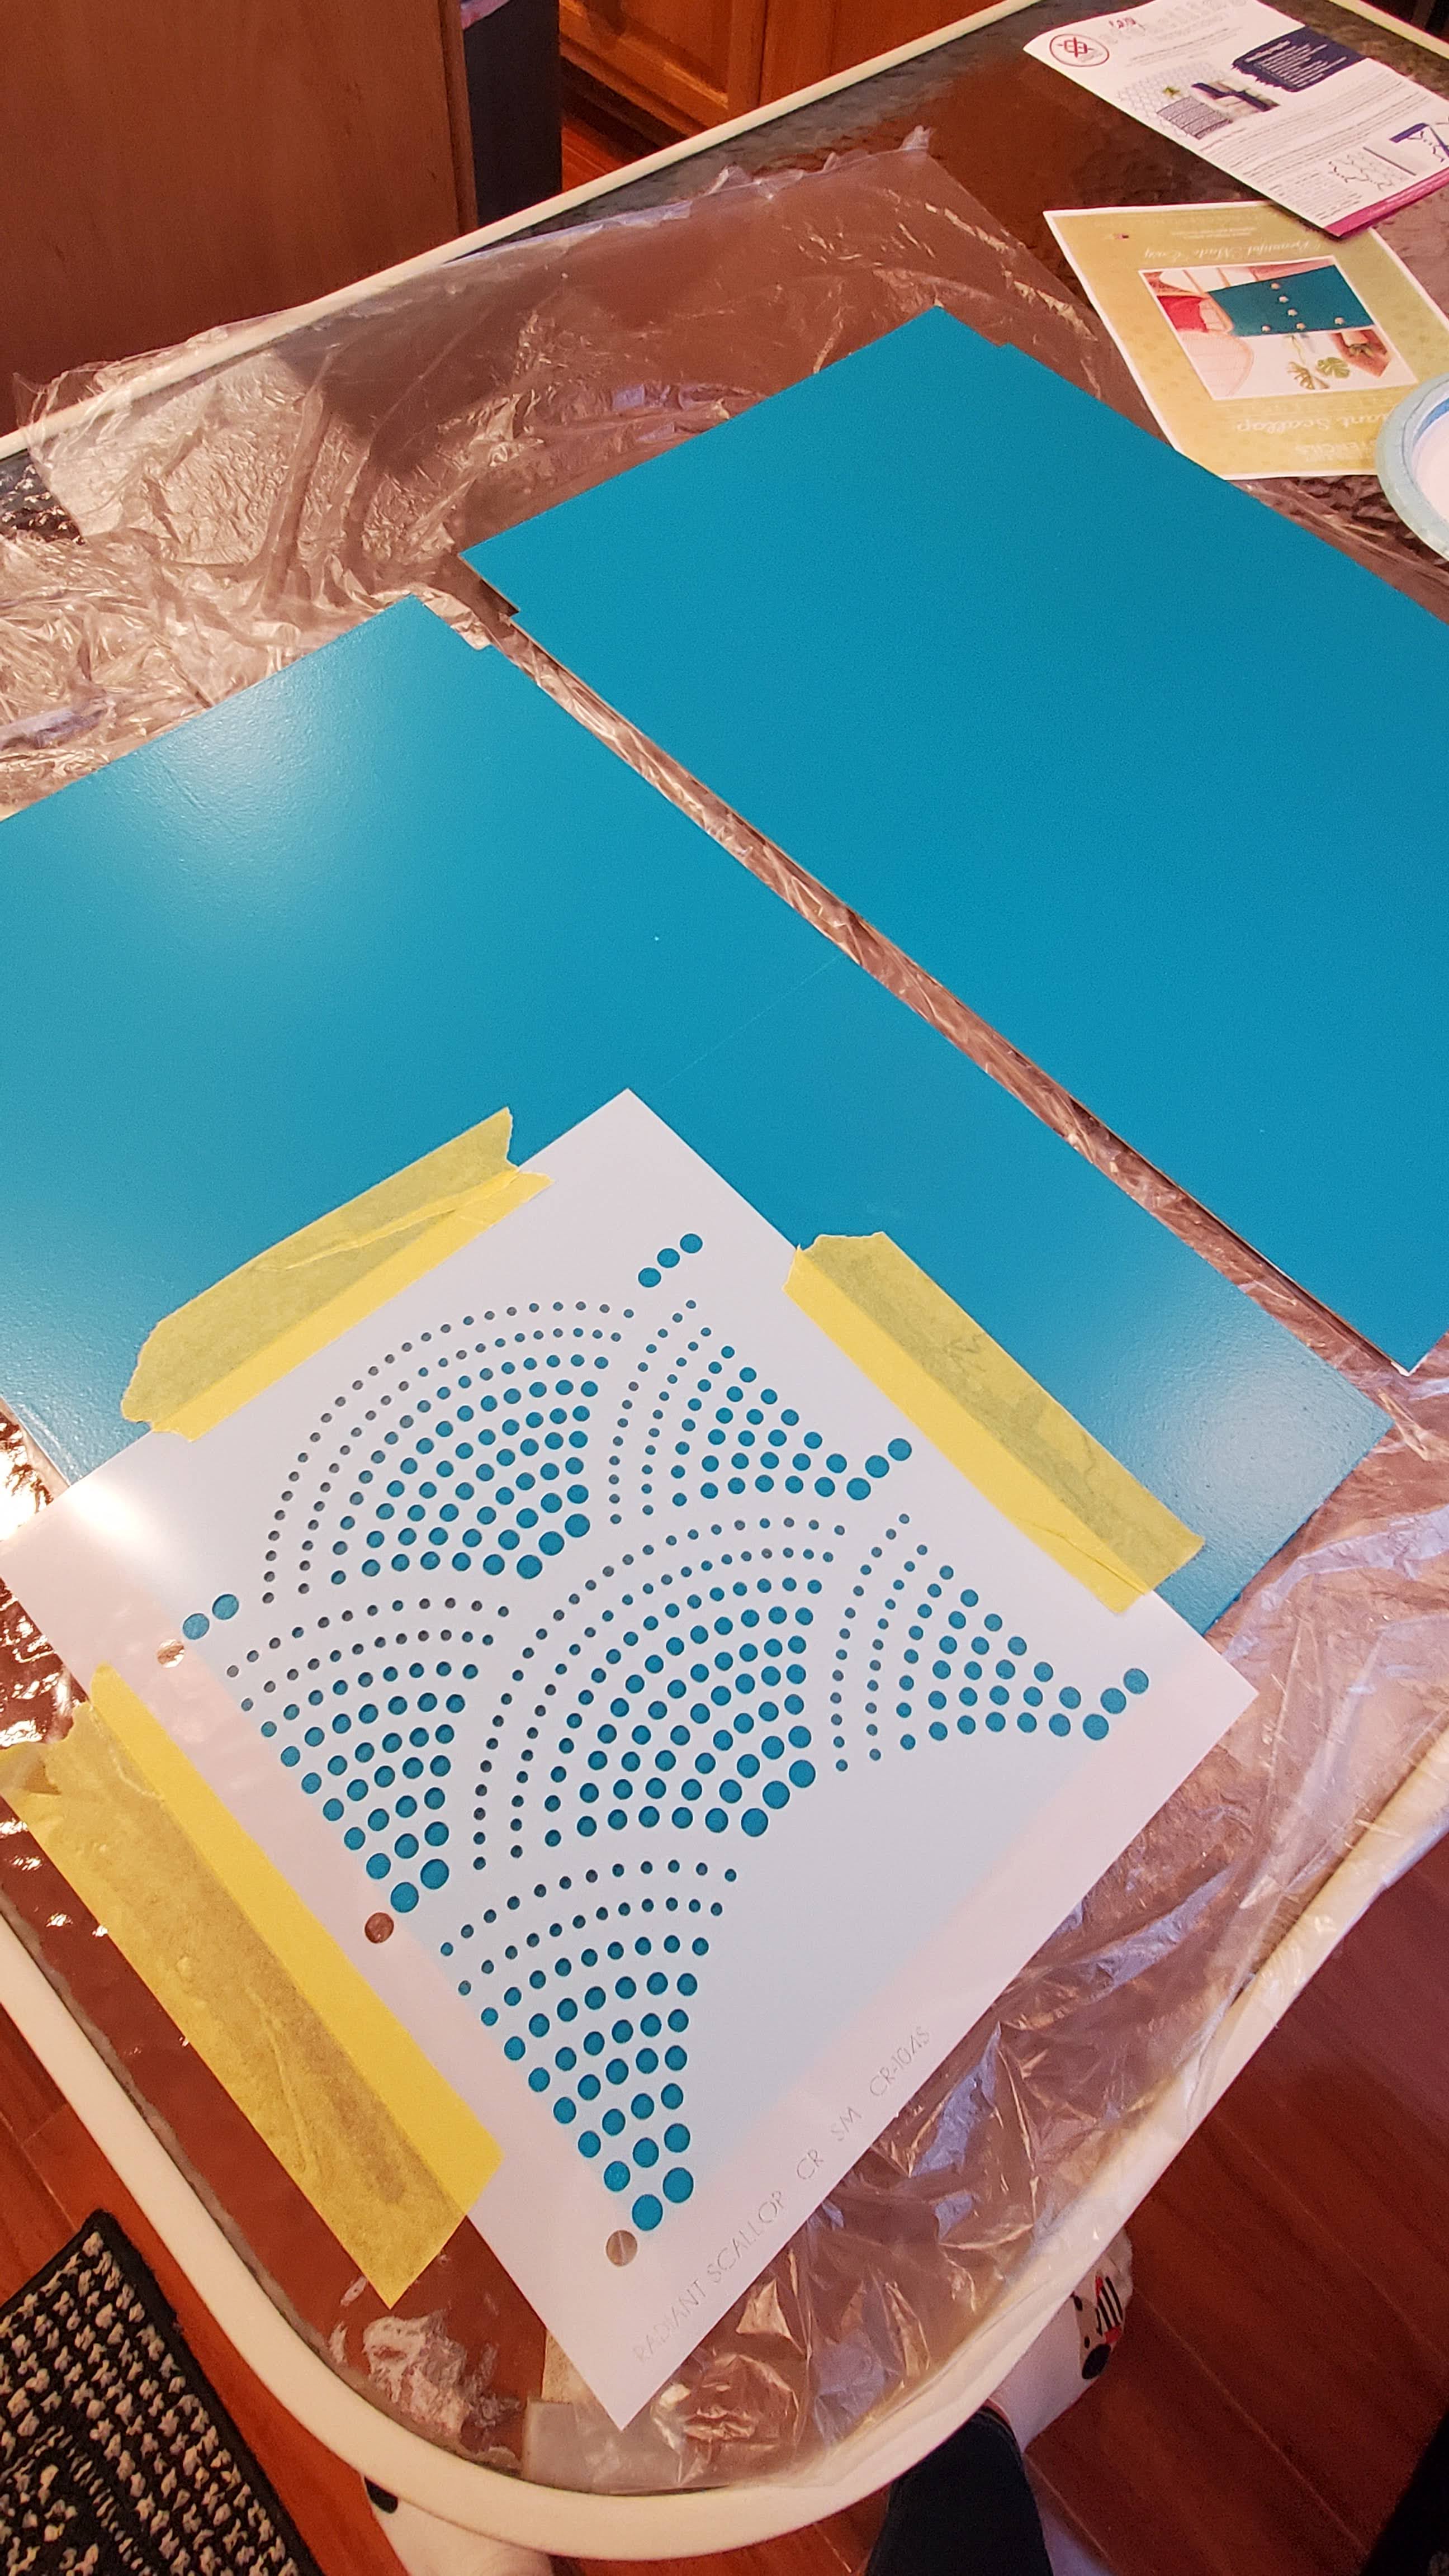
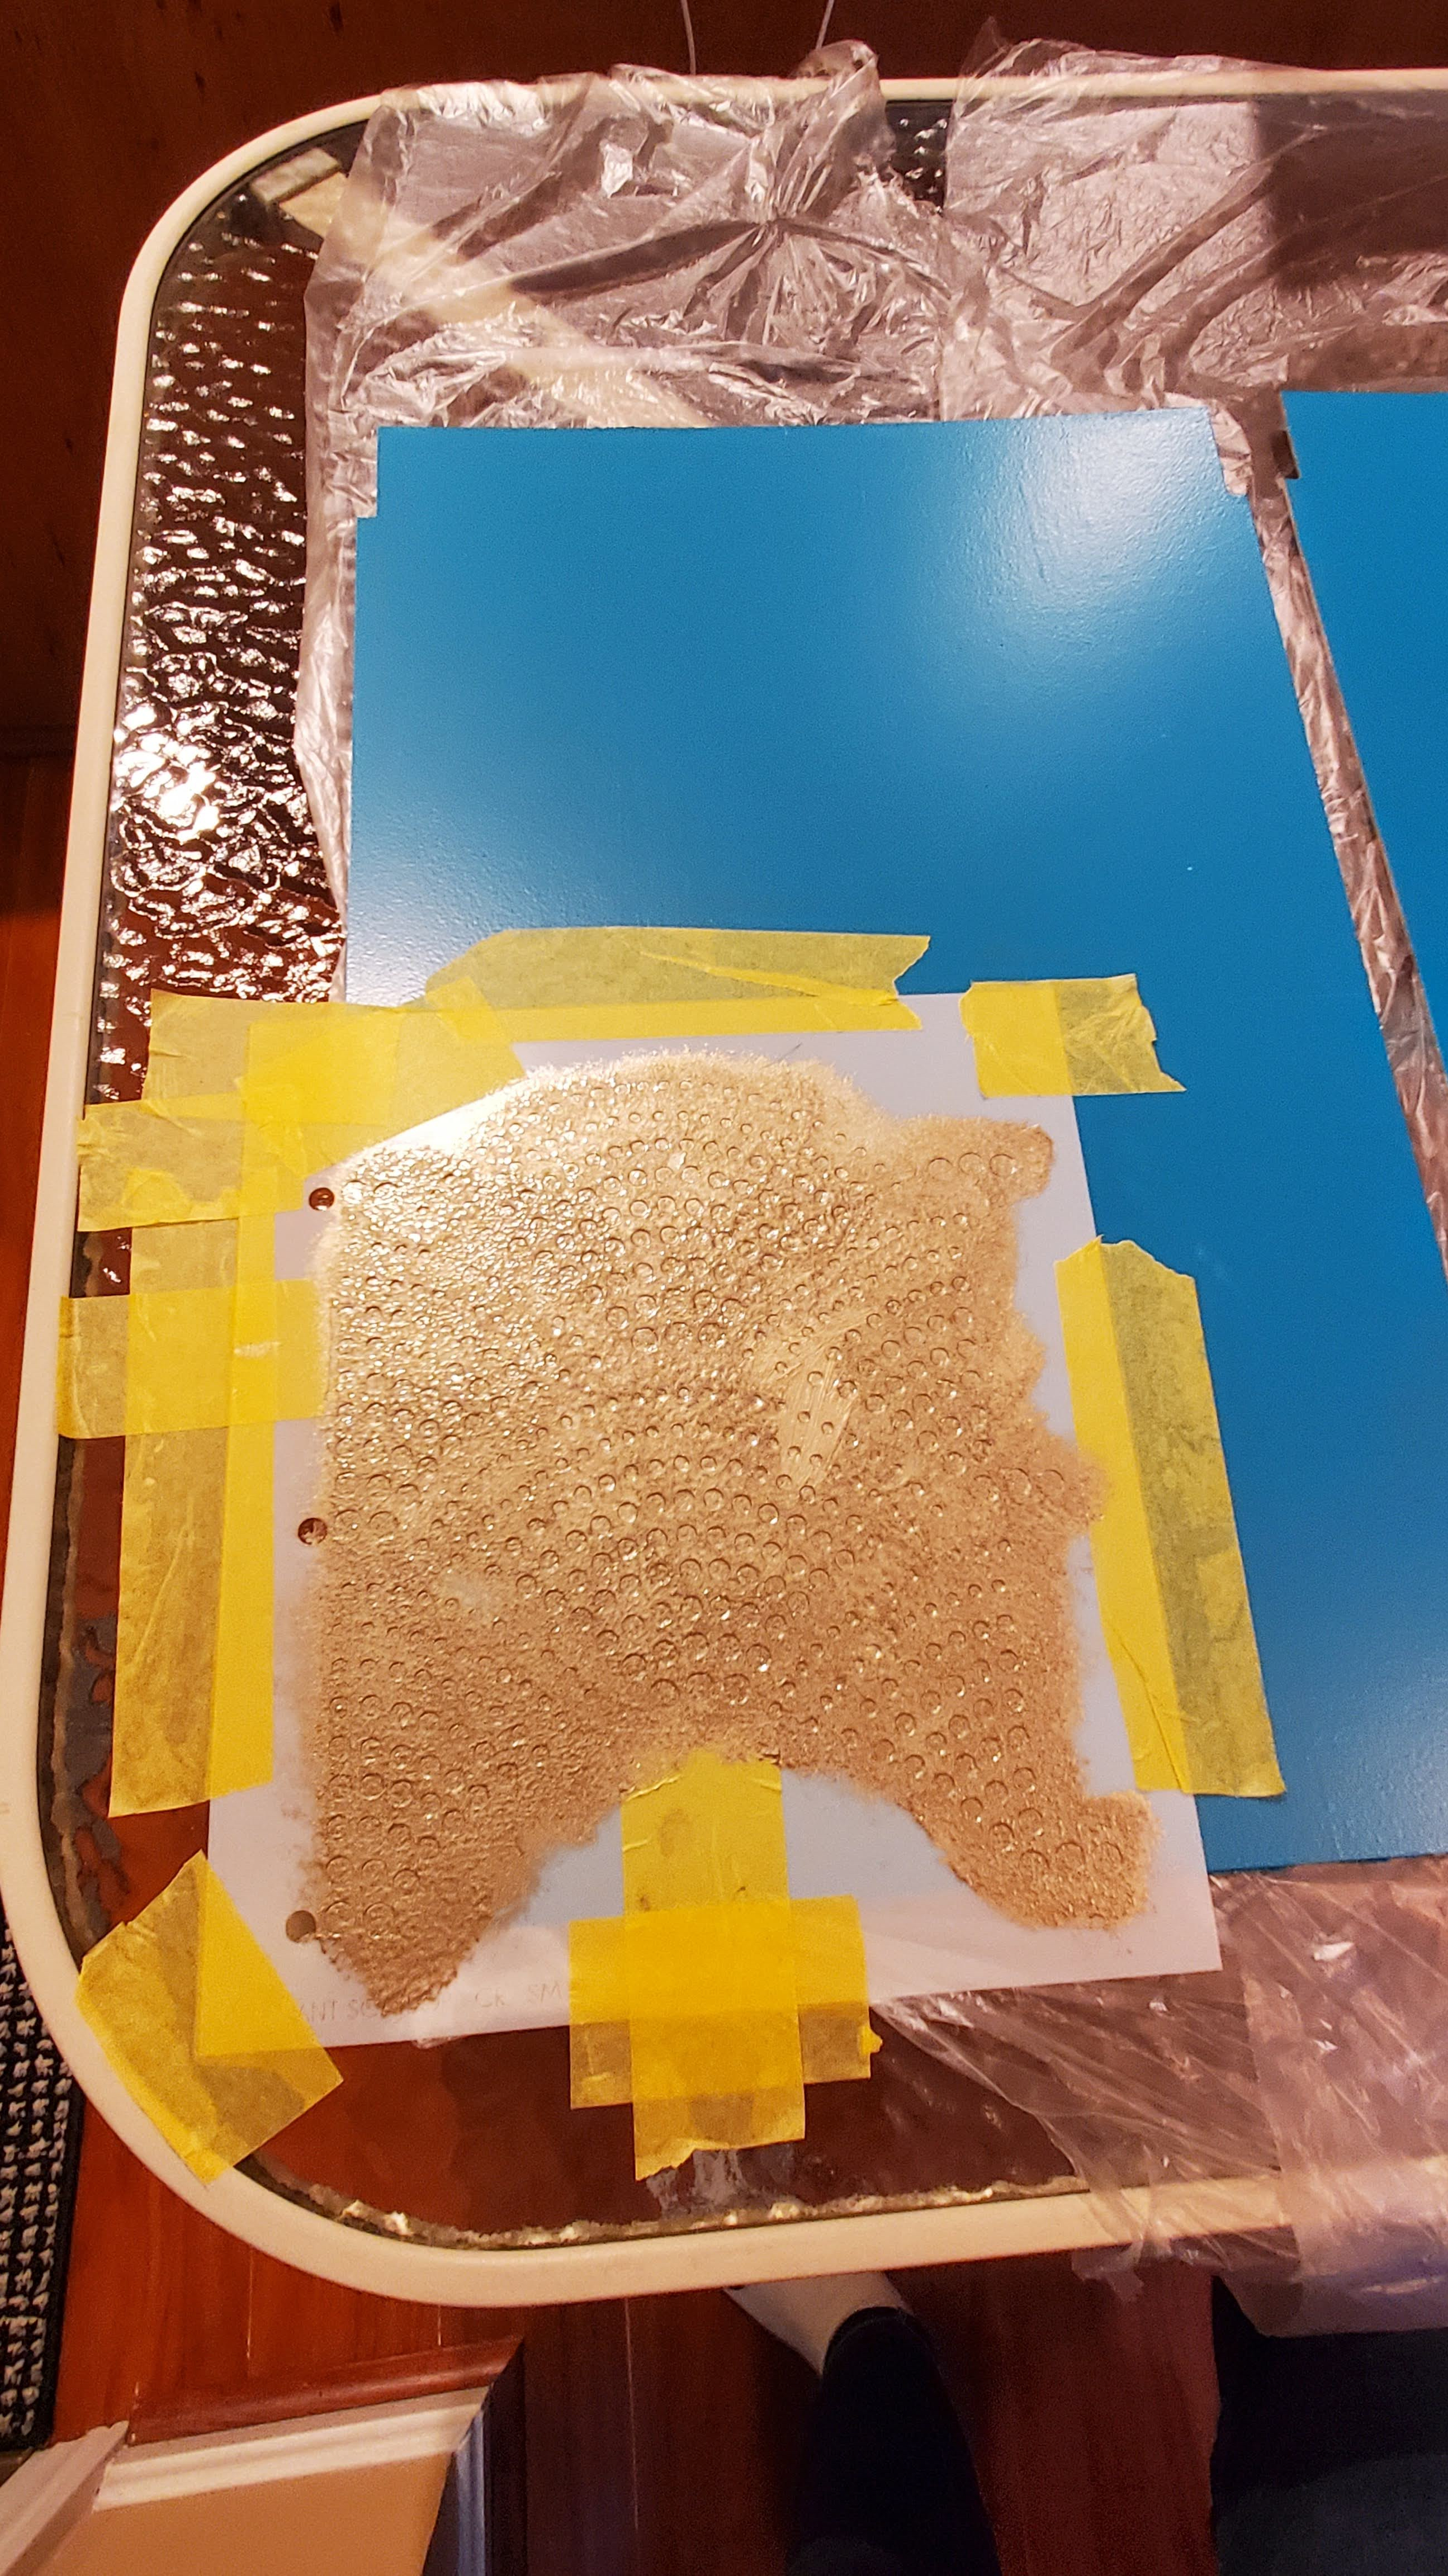
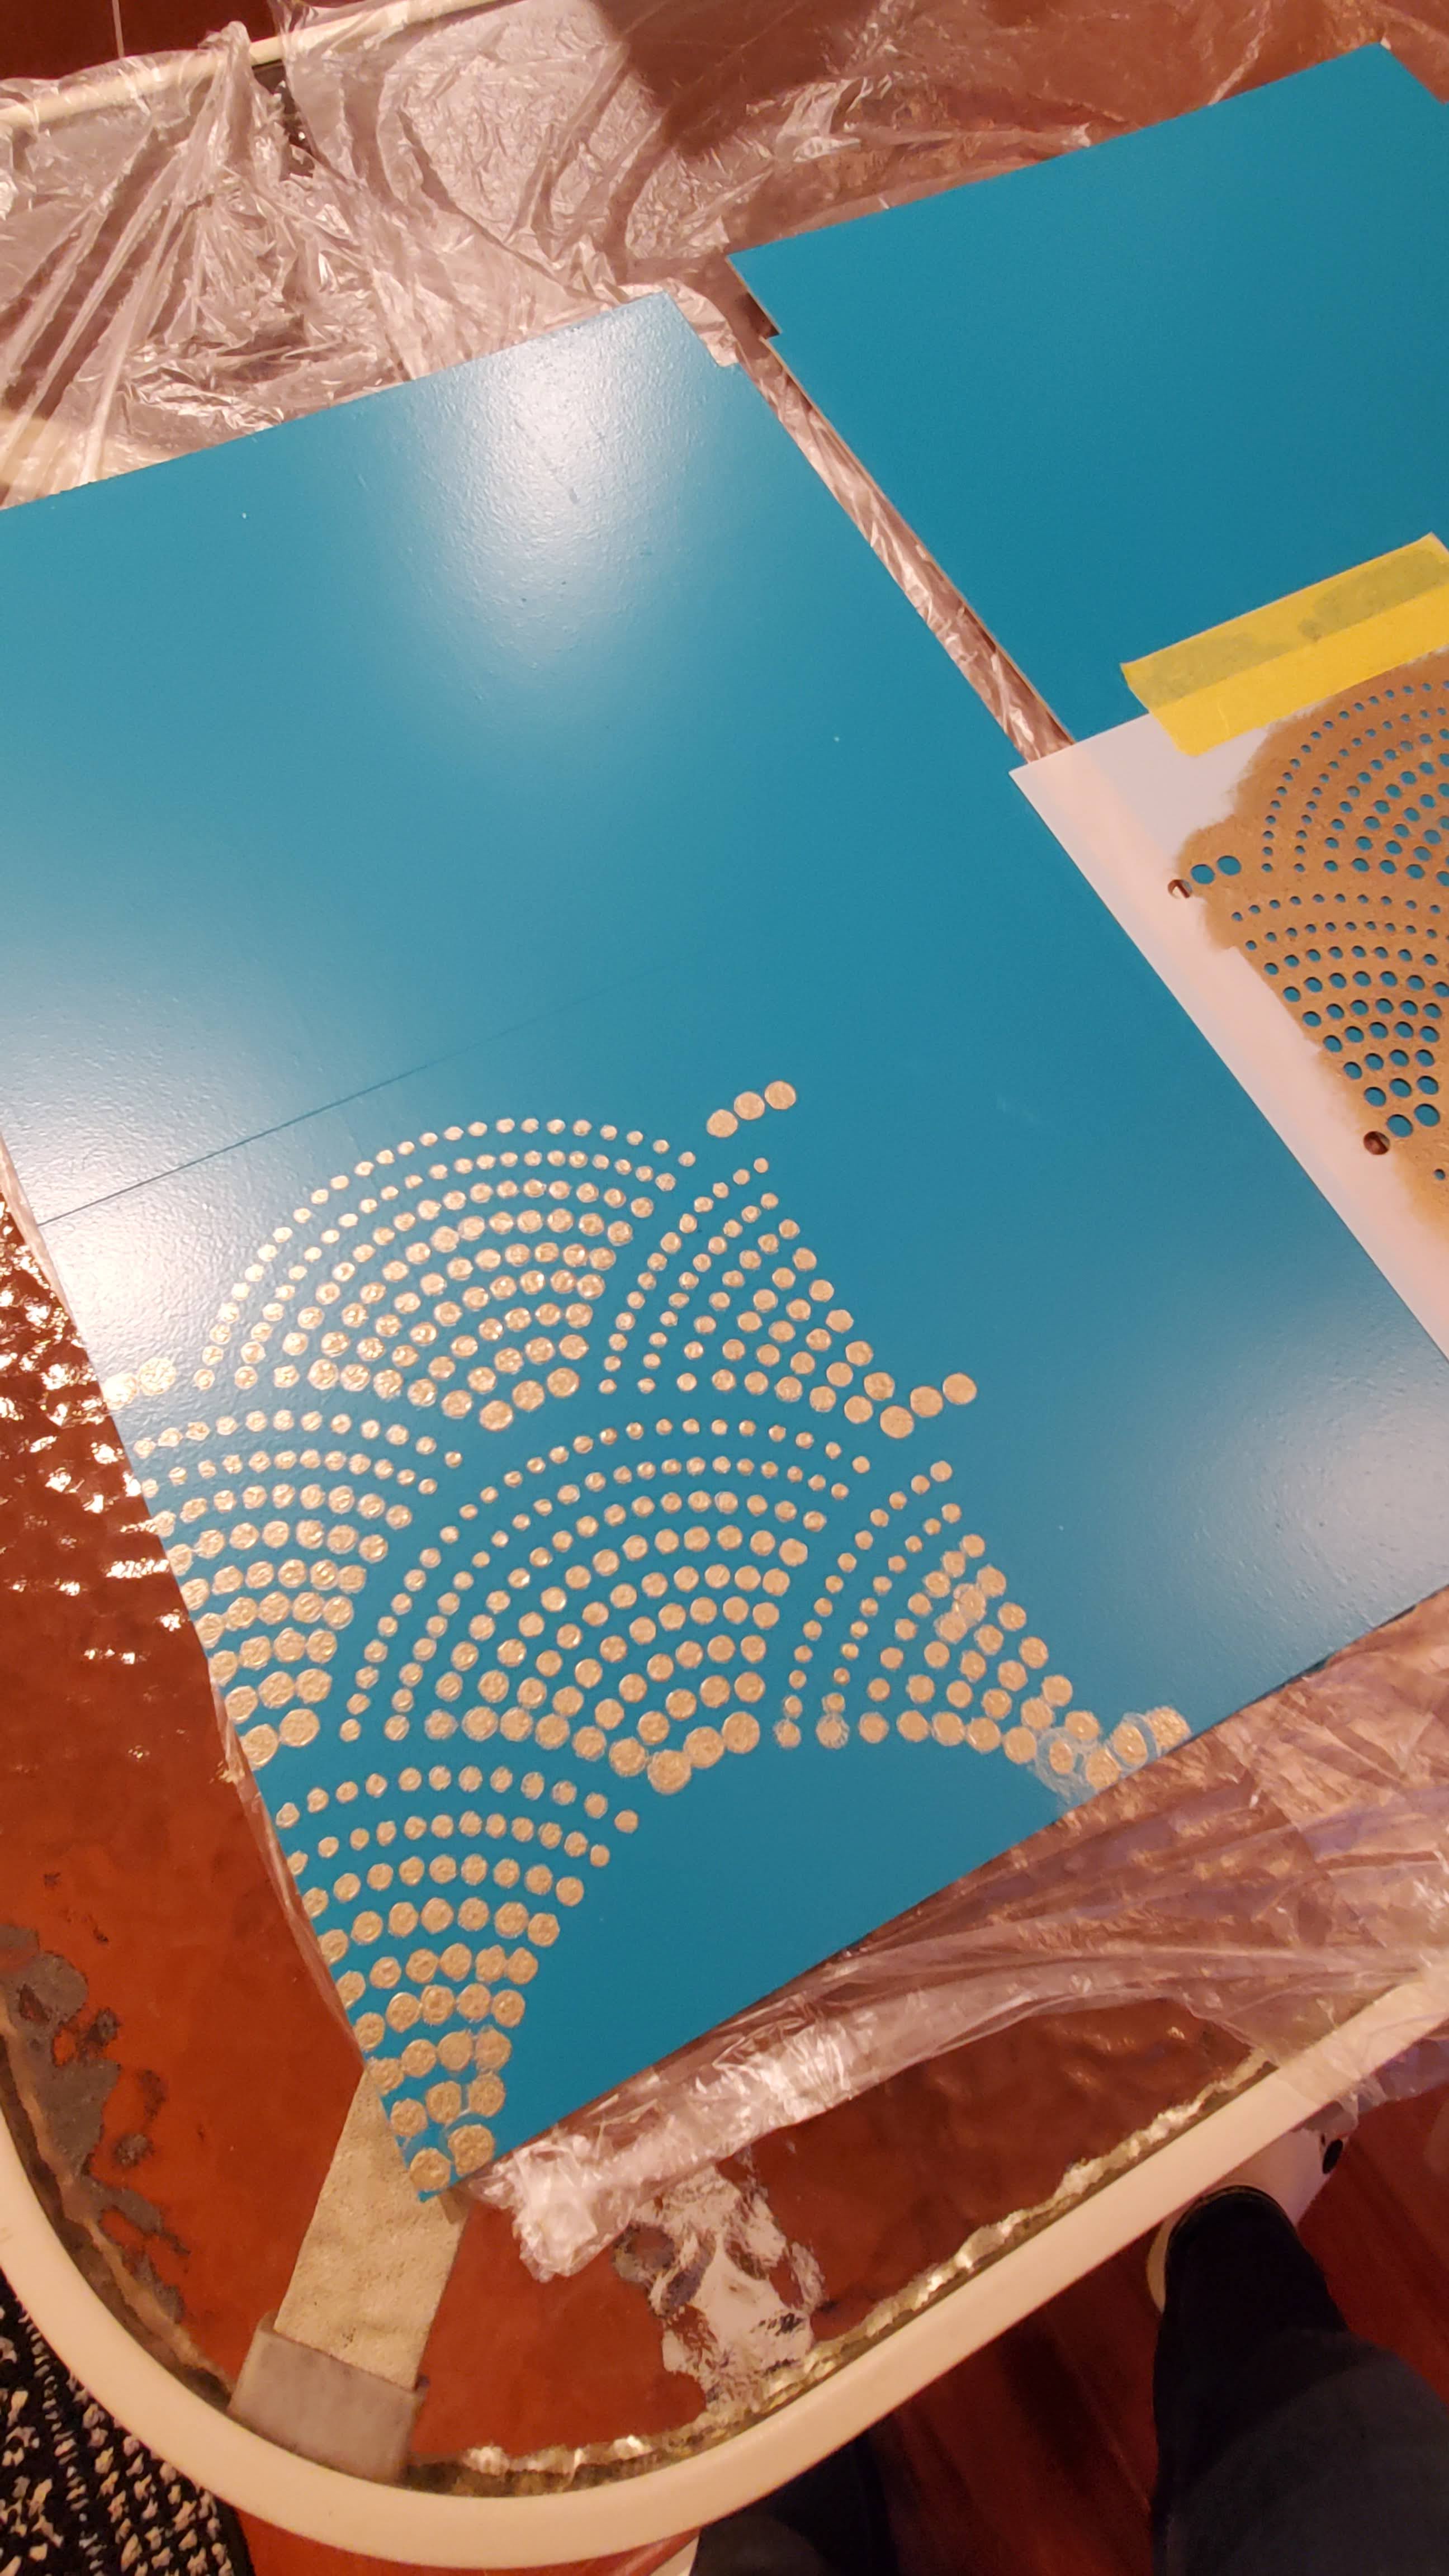
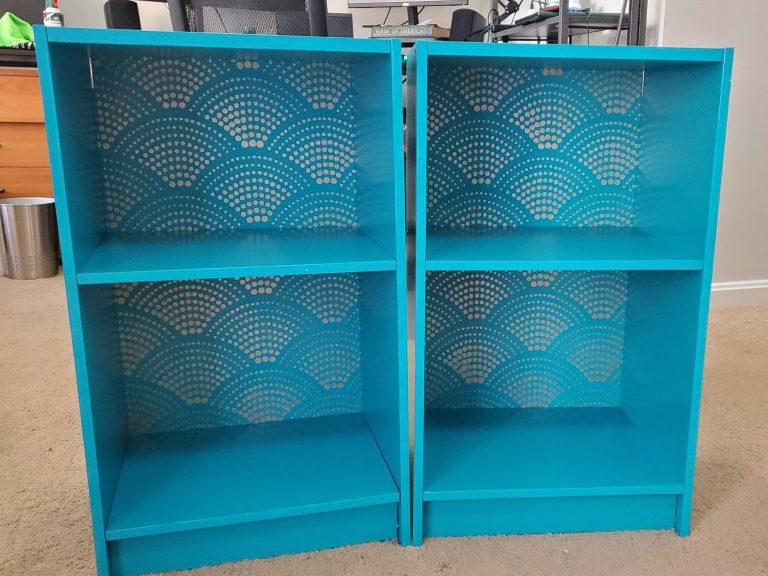
Want to add a special effect to the inside of your nightstands? I did! For this, you’ll need additional paint. Think about the color scheme you are going for. Metallic gold and silver both would look good.
Materials Needed
The materials listed below are what I used and can recommend.
- Nightstands – Gursken from Ikea
- Sandpaper – Recommend 220 grit if you are keeping your own nightstands.
- Paint – One quart of Behr Enamel Int/Ext Cabinet, Door, & Trim Paint in the color of your choice
- Primer – One quart of Zinsser B-I-N Primer
- Top Coat – One quart of Varathane Clear Satin Water-Based Interior Polyurethane
- Paint Roller Set and Brushes – Paint roller (4″ is probably ok); paint roller covers (foam); roller tray, paint brush – pick this up from the home store when you buy the paint
- Drop Sheet – Protect your work area with this drop sheet
- Stencil (Optional) – If you are applying an accent on the inside of the nightstand, consider using a stencil. I bought mine from Cutting Edge Stencils.
- Accent Paint (Optional) – I used Metallic Gold paint from DecoArt
- Paper Towels – Paint is messy.
- Microfiber Rags – You want to ensure the furniture is clean before you start so you should wipe them down with water and dry with a microfiber rag.
The Set-Up
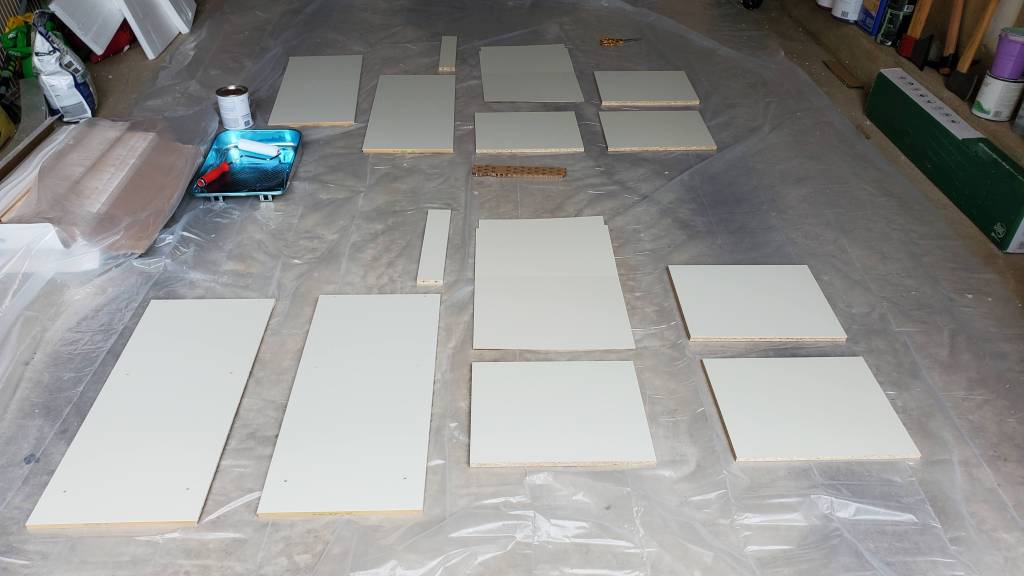
Find a place where you can paint that can remain protected for an extended period of time (away from curious animals or the elements). This isn’t really a one-day project. I completed a layer/side per day over multiple days.
Lay out the drop cloth and lay out all the pieces of the nightstands. I kept the pieces of each nightstand together, divided by a small piece of cardboard. Get your paint supplies handy.
Steps
Be sure to follow the instructions on the individual materials for the best application.
- Lay out all the pieces on a drop cloth in the garage or somewhere similar.
- If using your existing nightstands, sand them down to remove any wax coatings or bumps.
- Wipe down the pieces with a wet rag and dry fully.
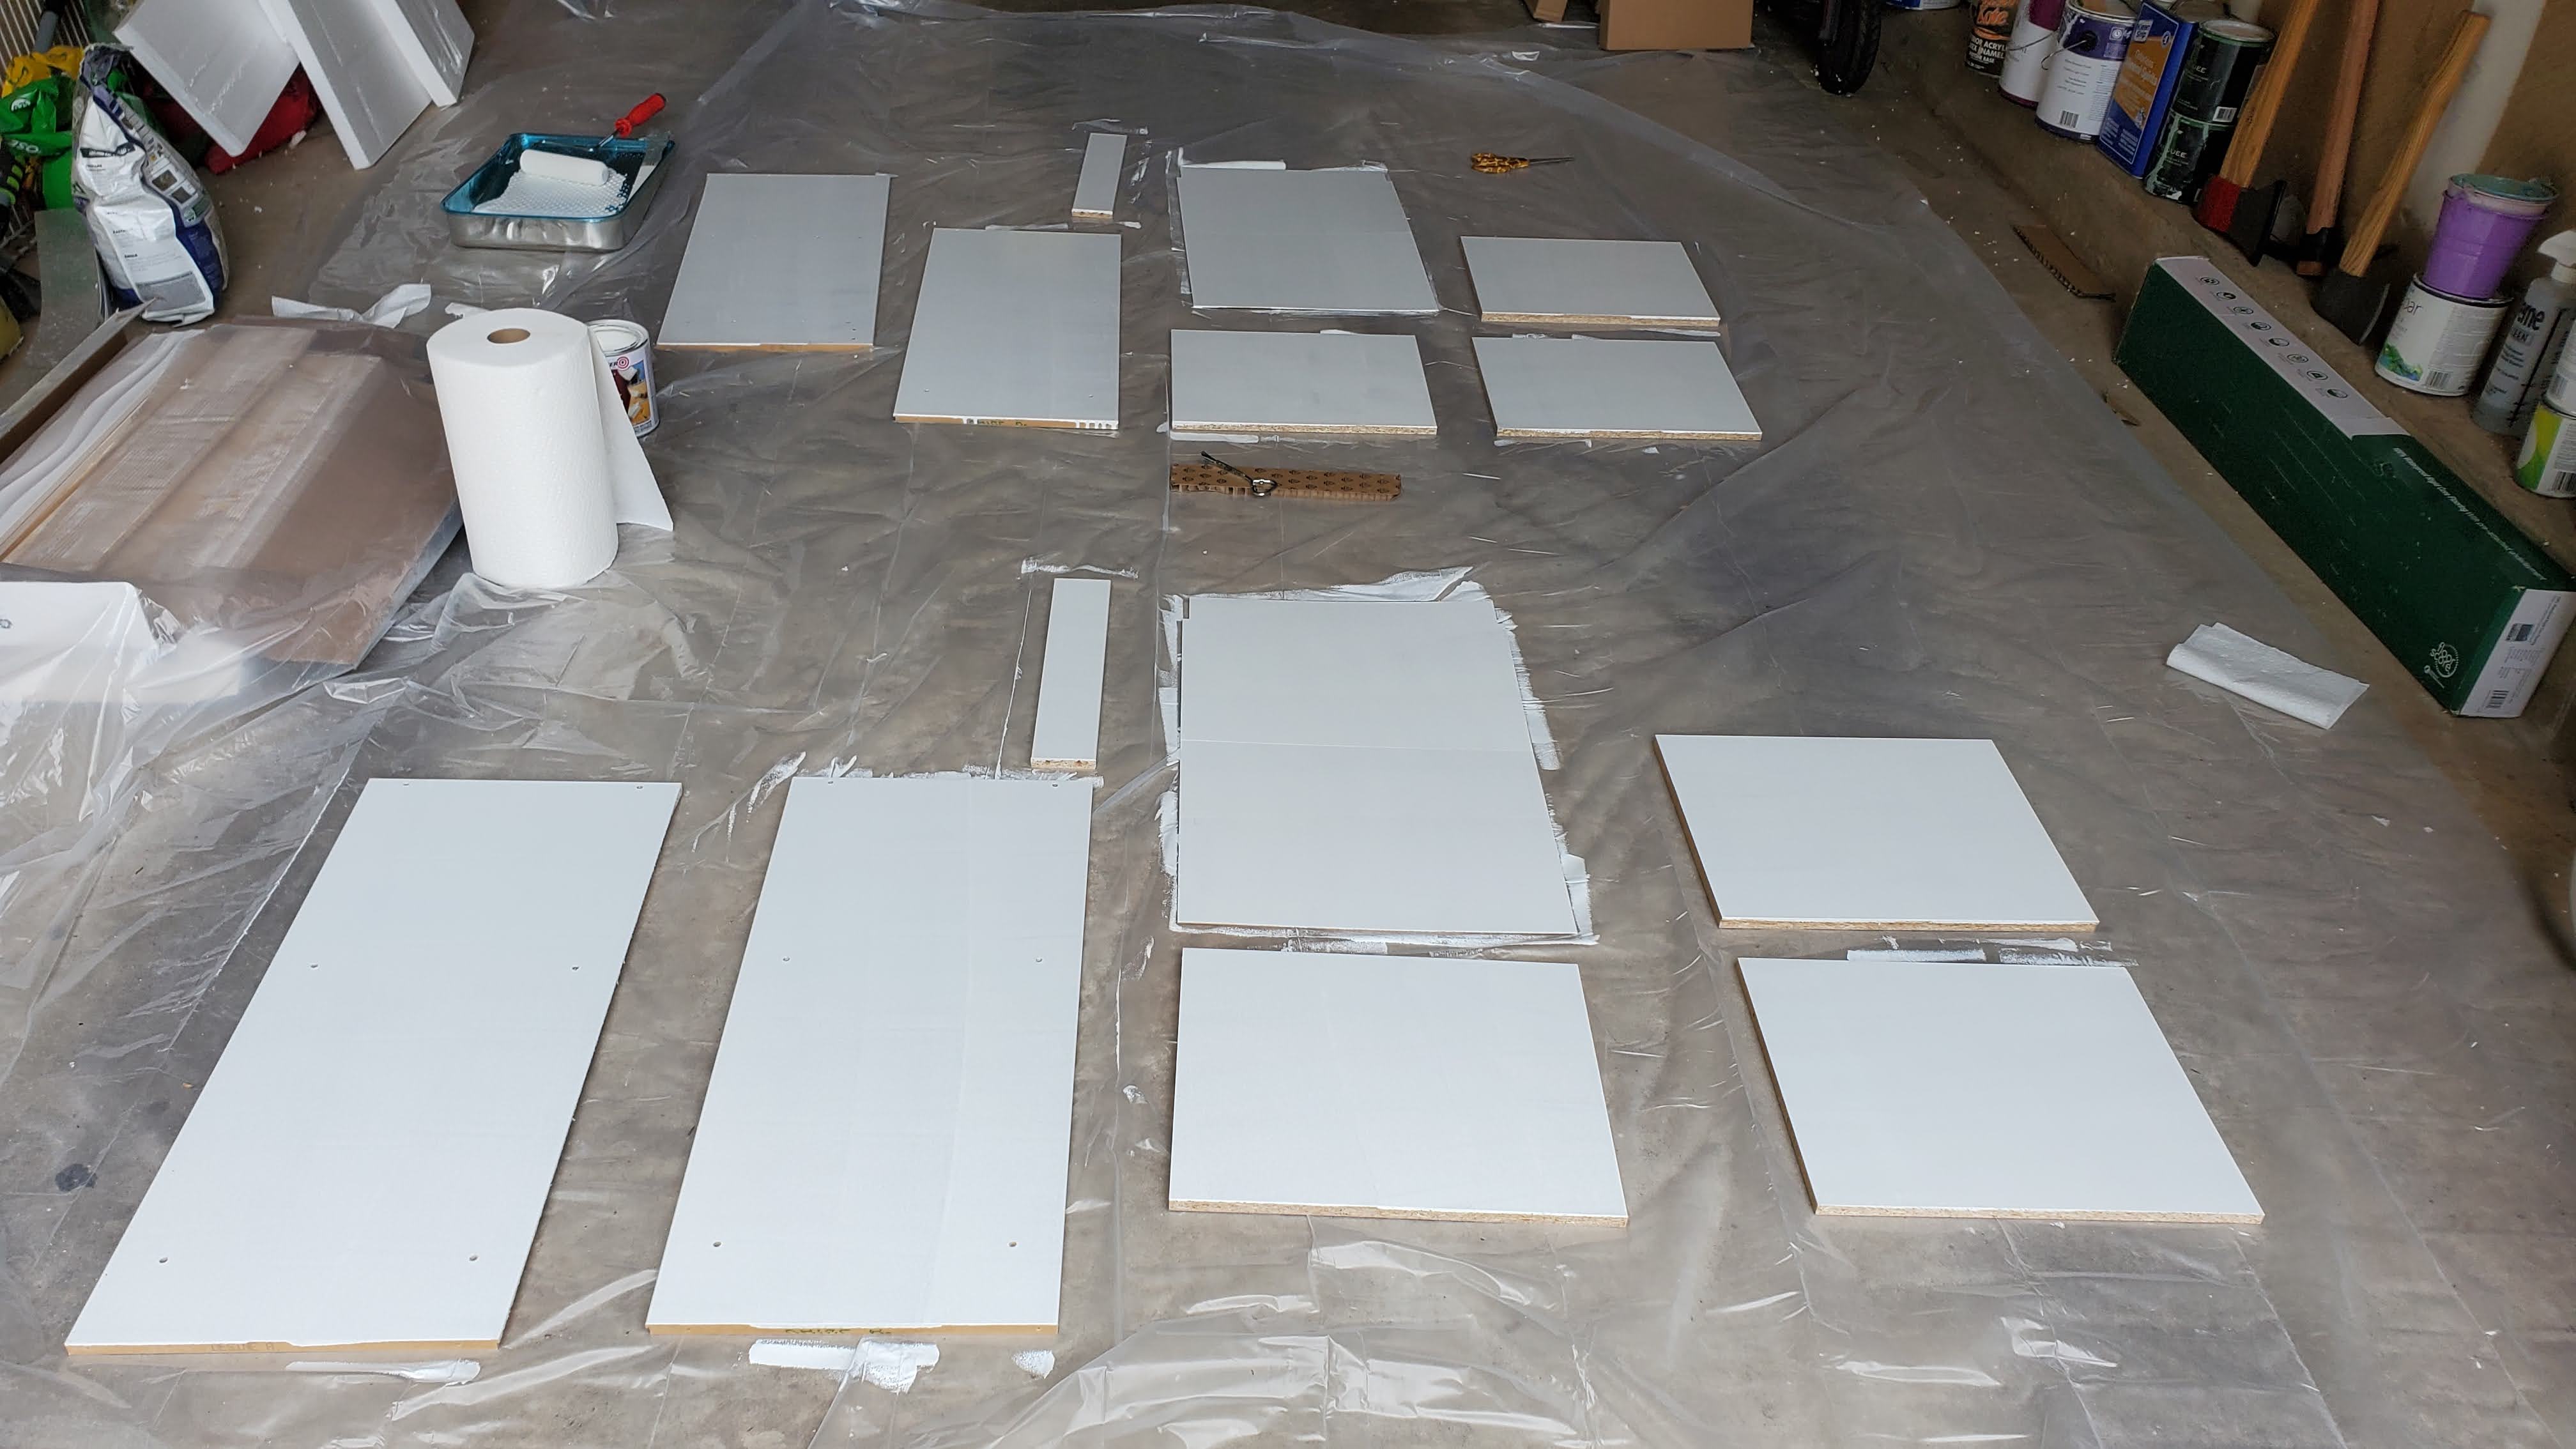
- Prime the cabinet faces and the finished sides. Allow to dry.
- Add a second coat. Allow to dry.
- Flip over the cabinet pieces and prime the faces and finished sides. Allow to dry.
- Add a second coat. Allow to dry.
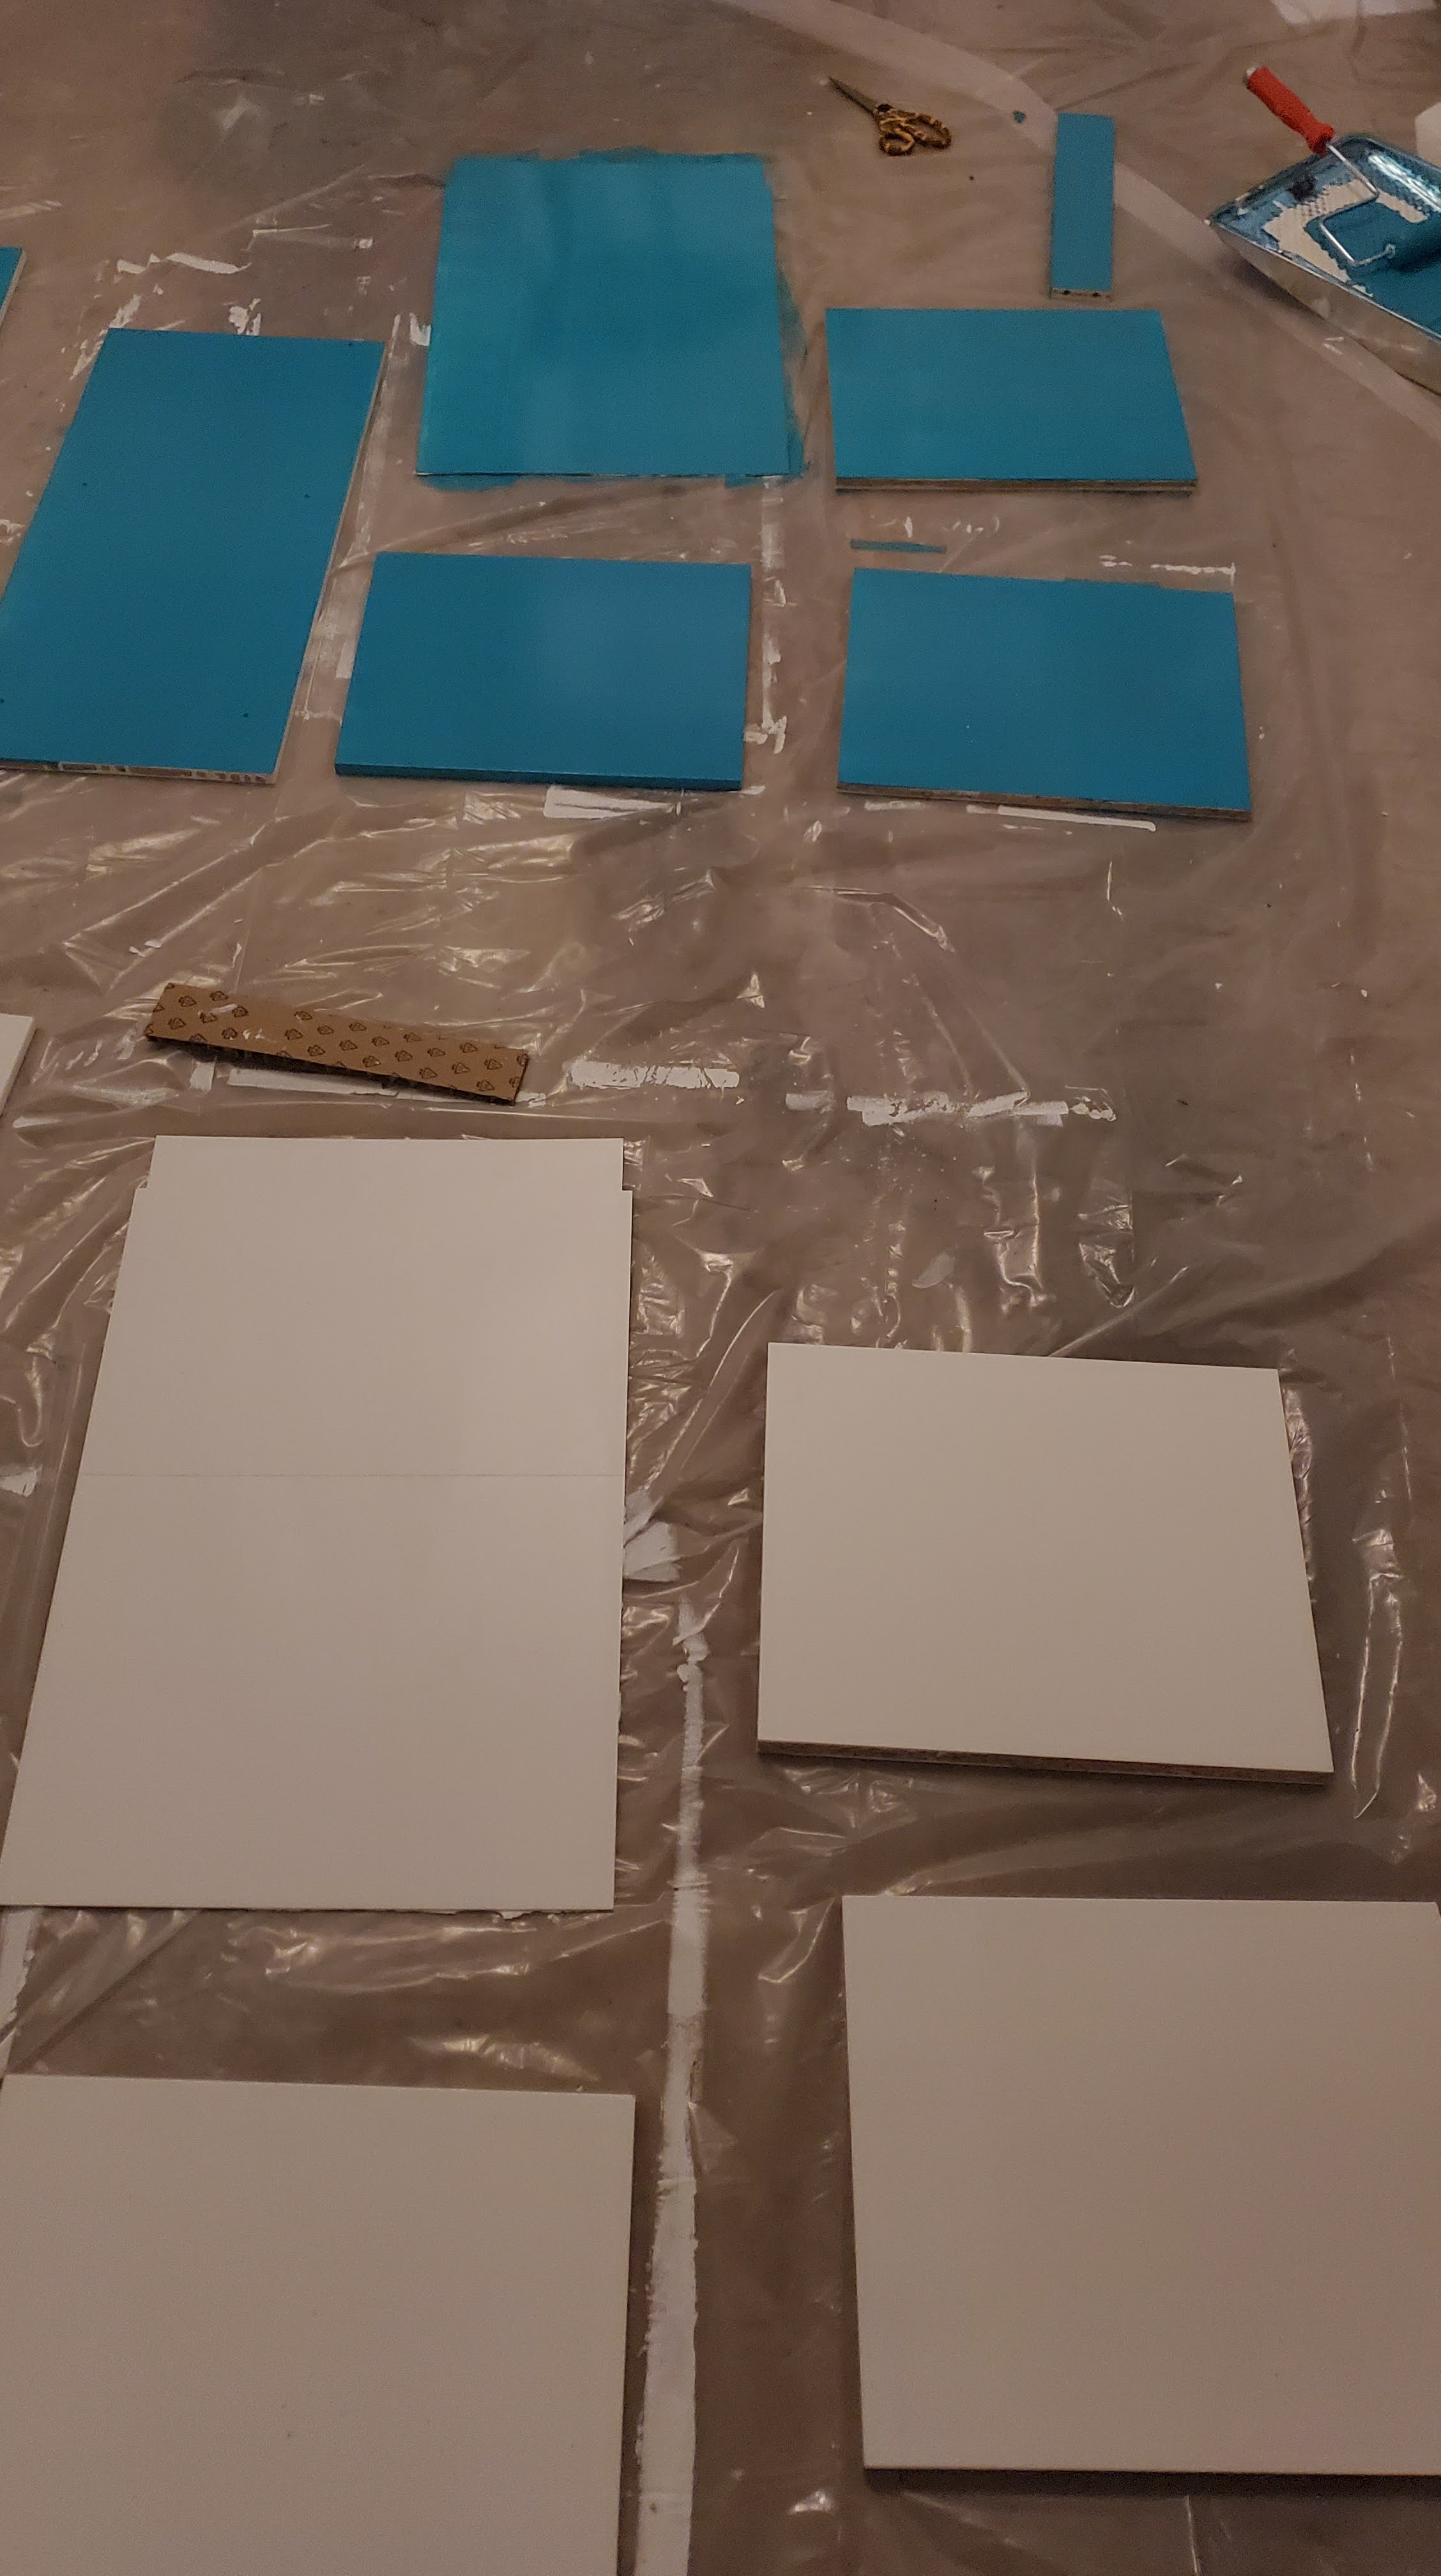
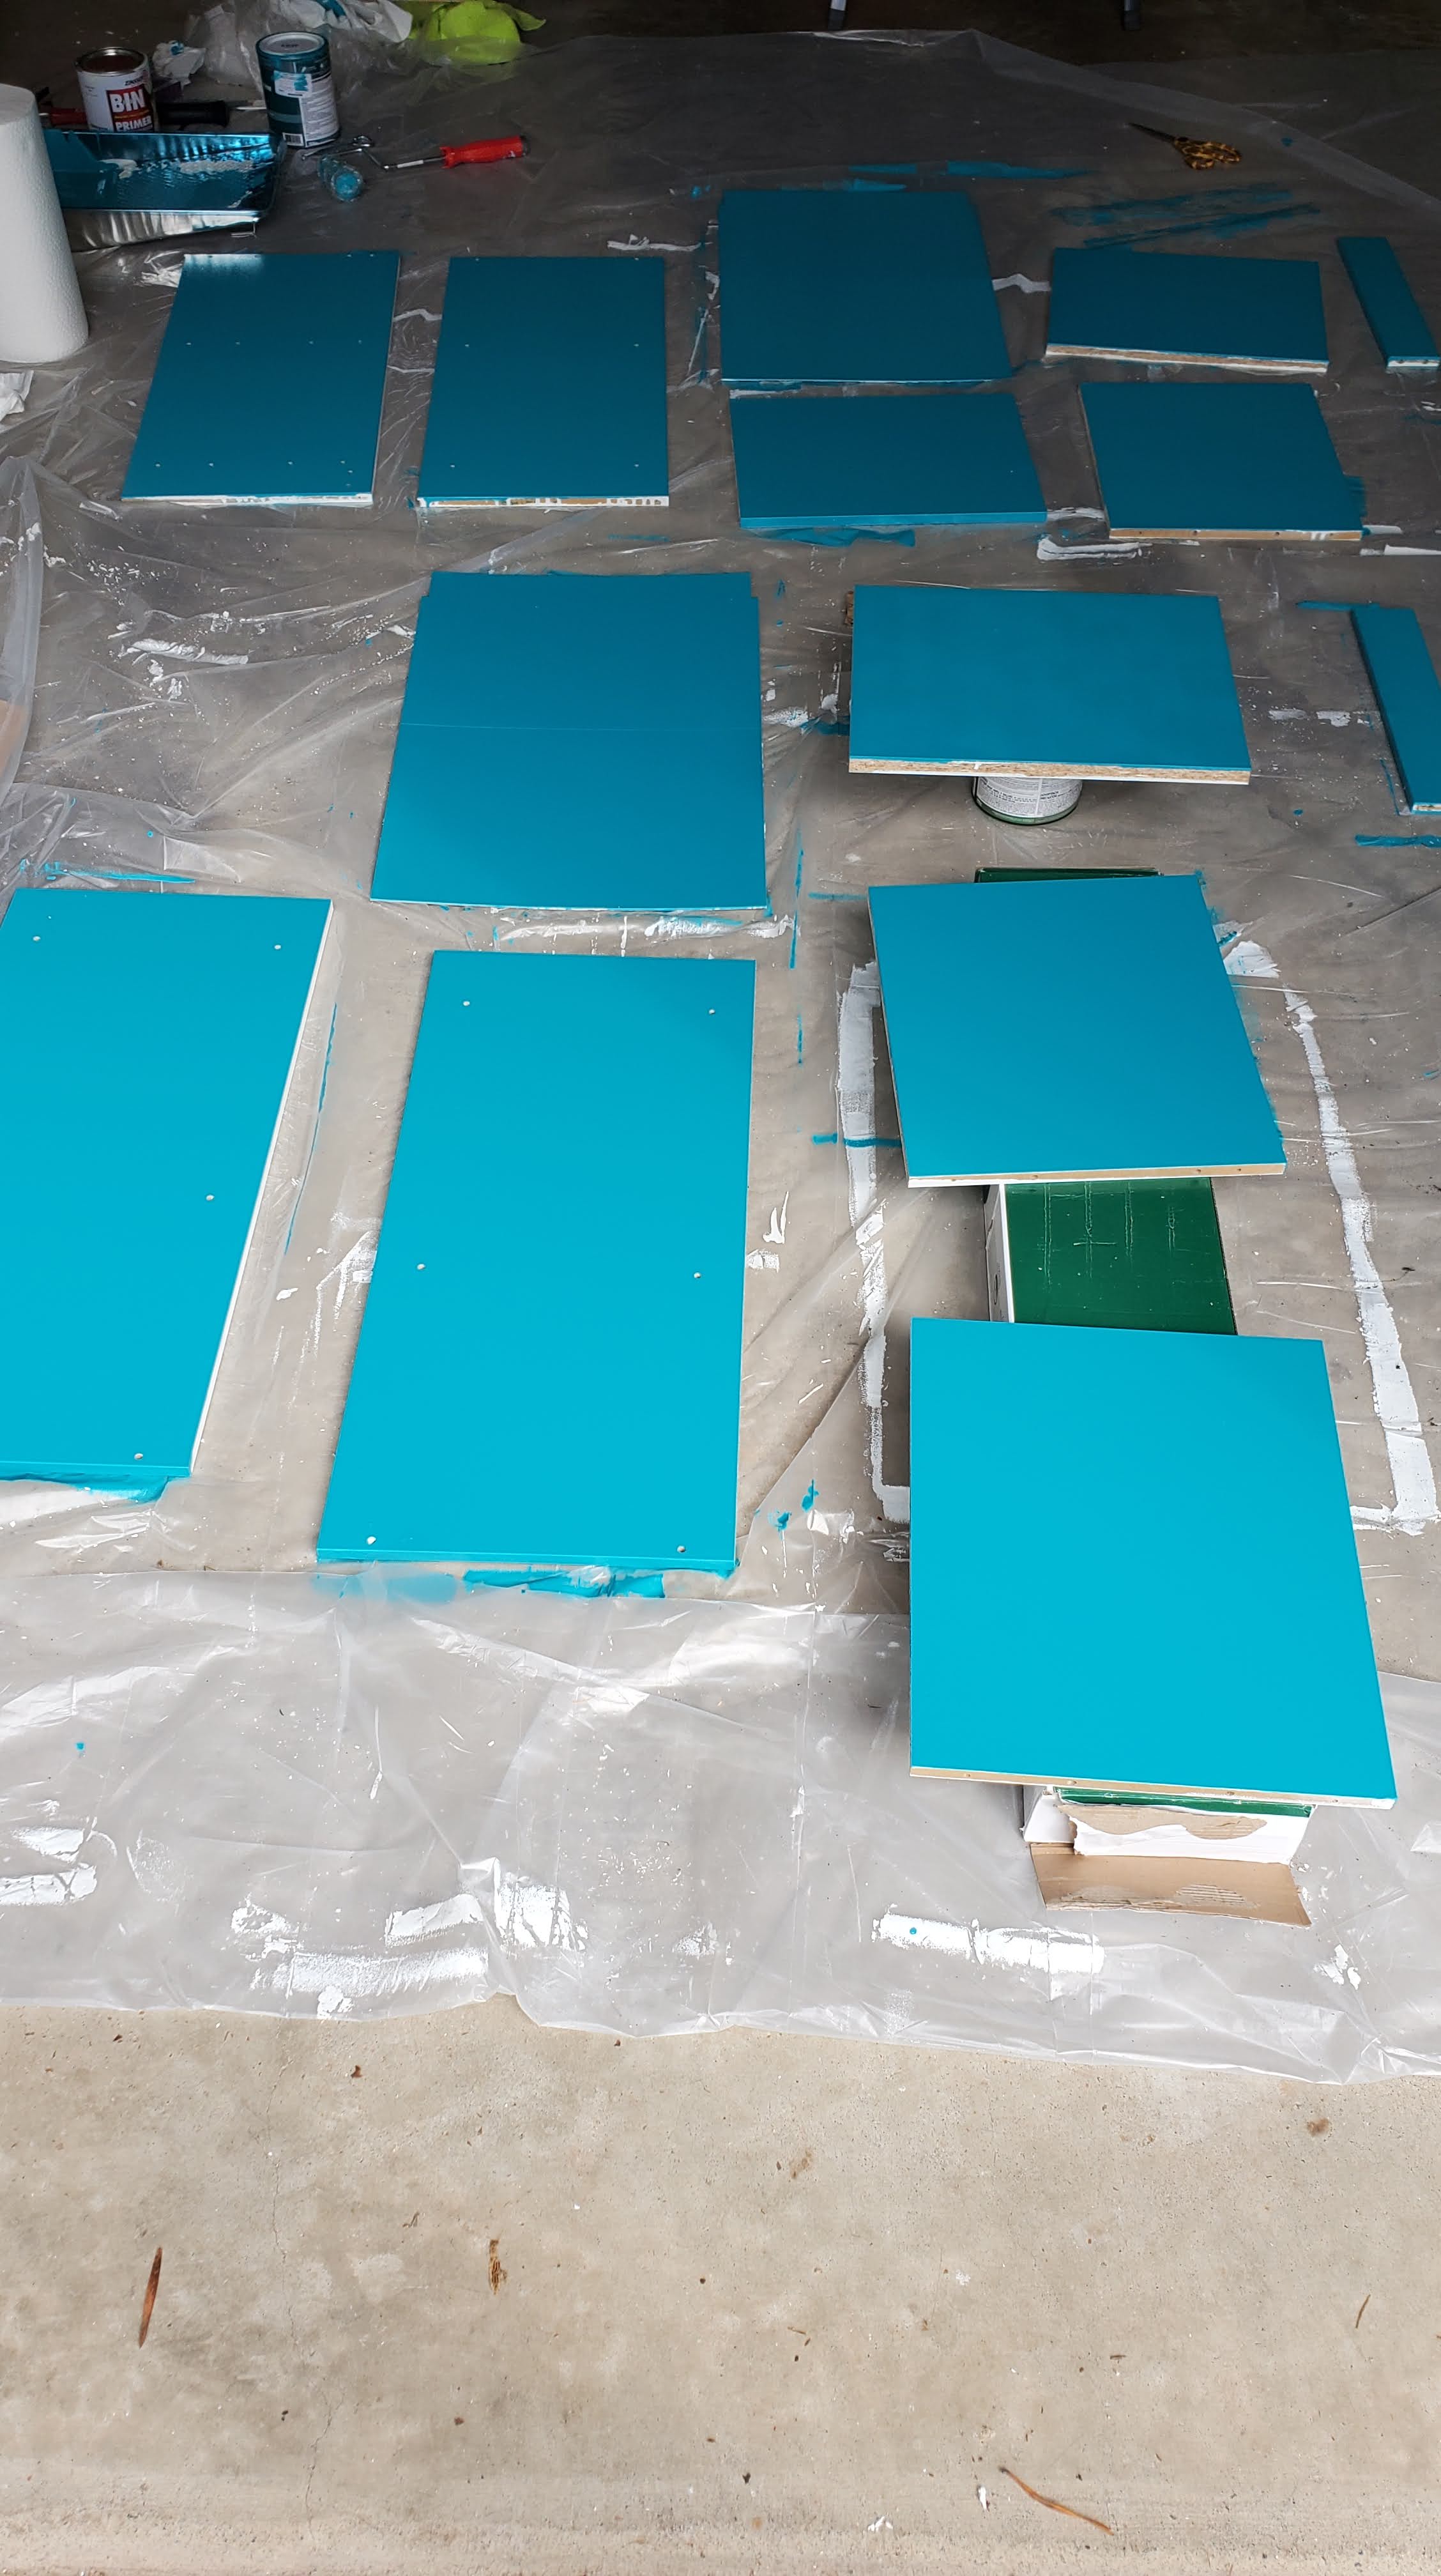
- Repeat Steps 4 – 7 for your colored paint.
- Repeat Steps 4 and 6 for your top-coat.
- Optional: Take your flexible back panels aside to apply your accent design. Apply a top coat.
- Assemble your nightstands.
- Put them in their place, style them, and relish in your hard work!
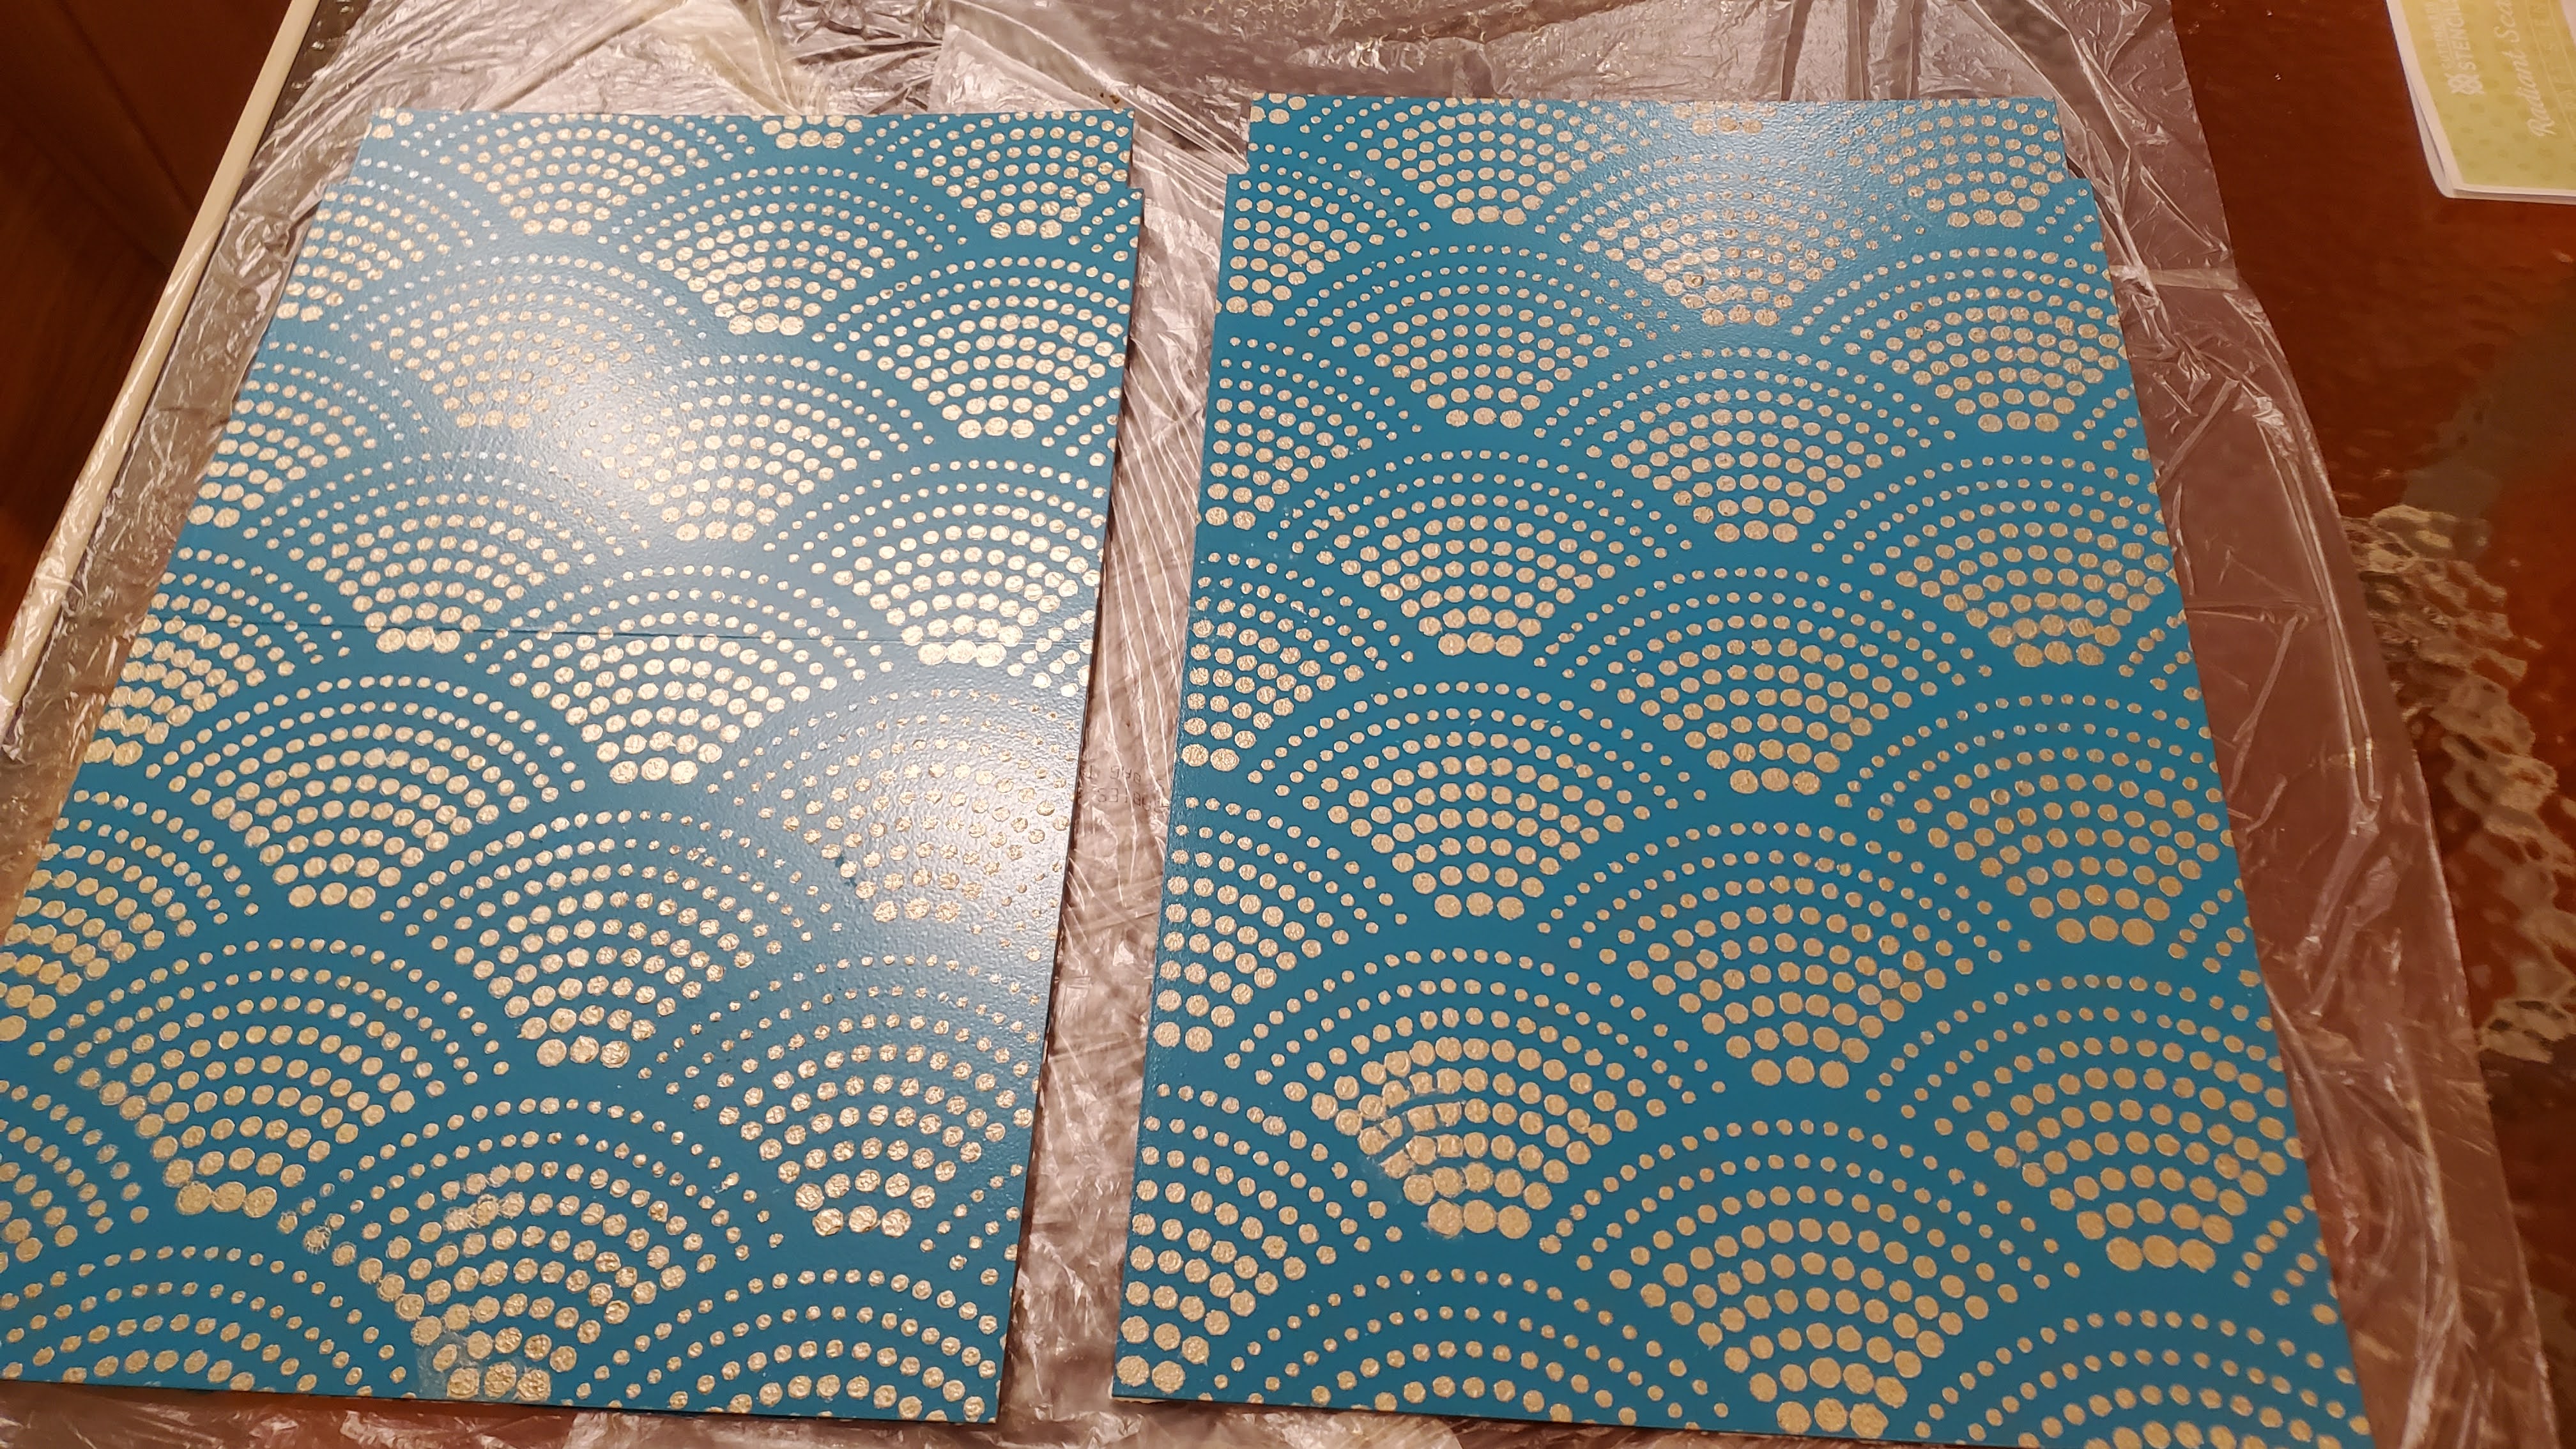
The Finished Product
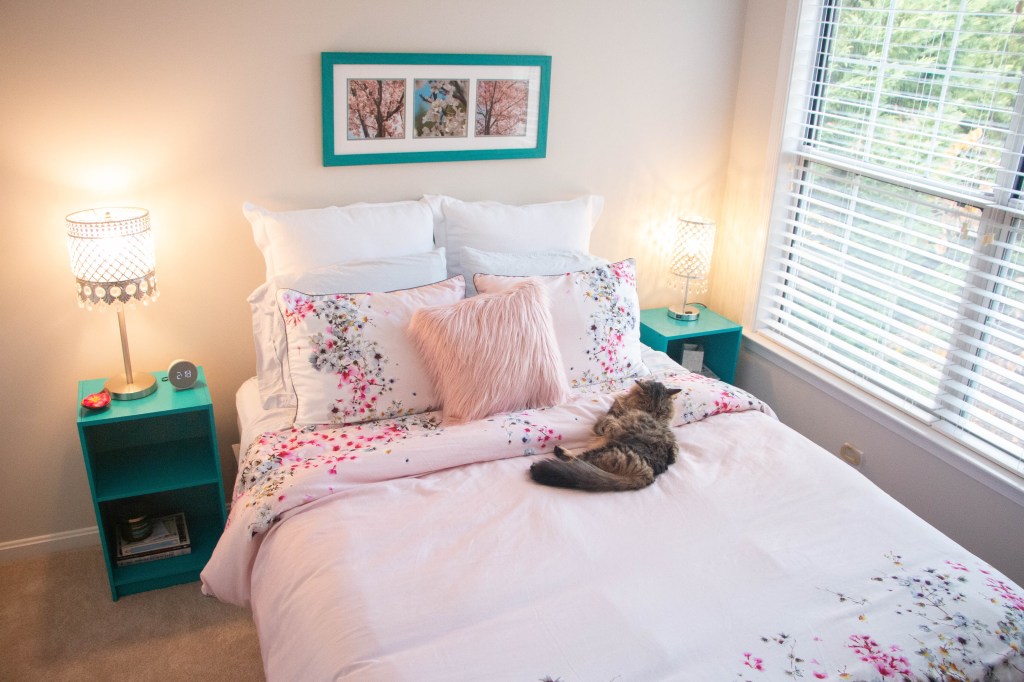
I wasn’t thinking about color theory when I ordered the frame with the selected prints. Lucky for me, red and green are complementary colors, meaning their respective shades are complementary, as well. This worked out for me with the pink and teal combination.
In closing, I hope this post has been a helpful resource in your nightstand-painting journey. Whether you’re rejuvenating your primary bedroom, guest bedroom, or children’s bedroom, a fresh coat of paint can truly work wonders in transforming the look and feel of the space. Remember that patience and attention to detail are your allies throughout this process. Don’t be afraid to unleash your creativity and choose colors or accent designs that resonate with your personal style.
Happy painting!
Discover more from Around with Ash
Subscribe to get the latest posts sent to your email.
